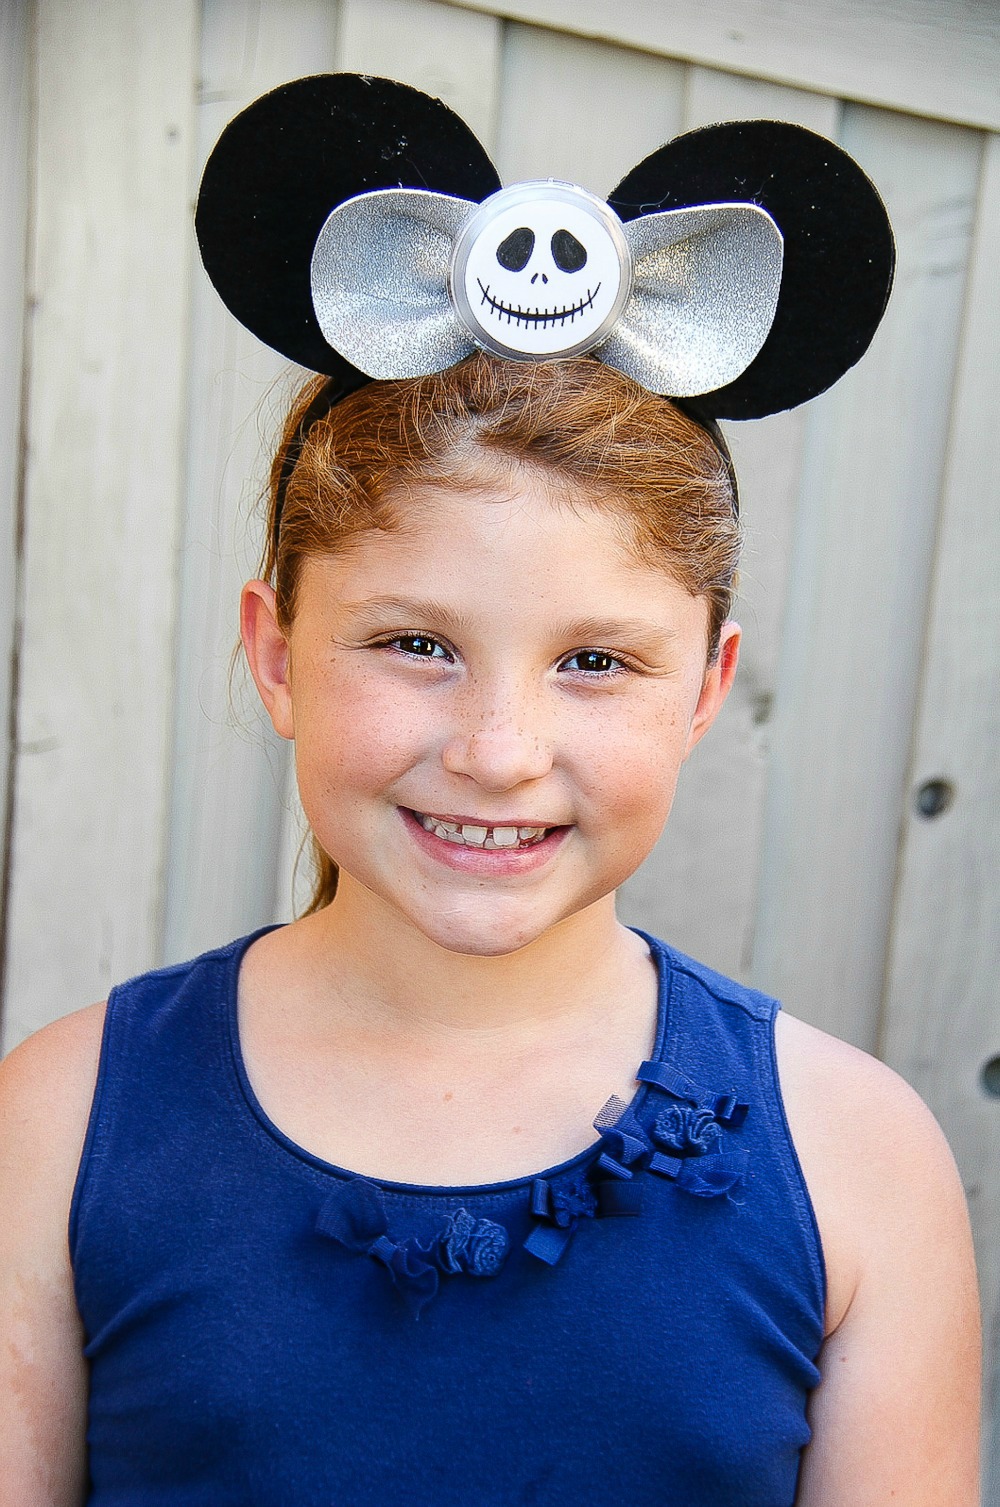
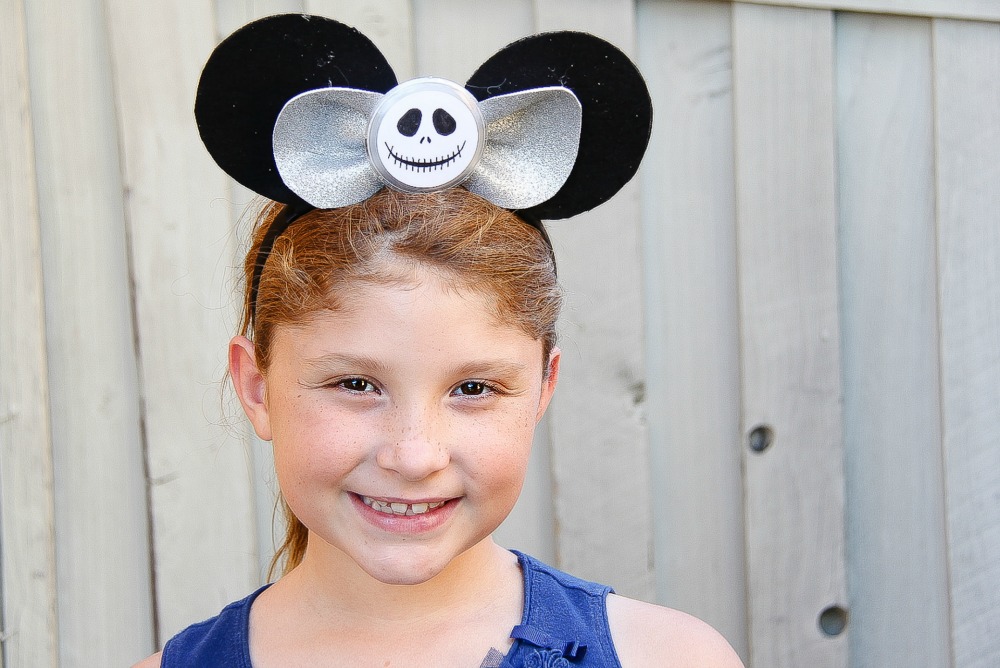
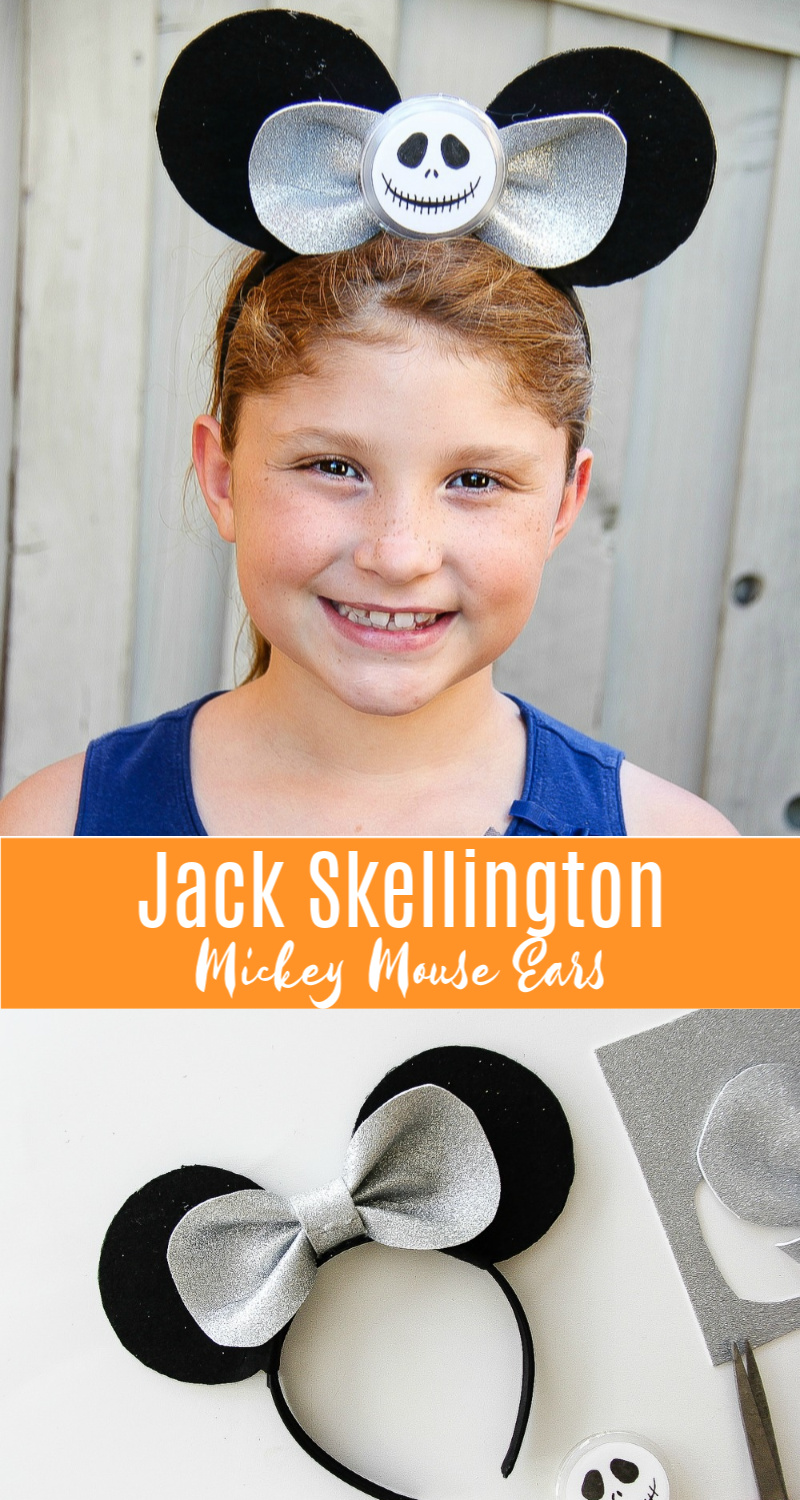
These Jack Skellington Nightmare Before Christmas Mickey ears are perfect for your next trip to the Disney parks or a Halloween party.
The Nightmare Before Christmas has to be one of my favorite Christmas and Halloween movies. I’ll watch it repeatedly through both holidays.
Note: This project was originally created for Hewlett Packard’s MyPrintly website however that site is currently offline. You can still view some of the MyPrintly projects on the HP YouTube channel.
Nightmare Before Christmas Mickey ears
You don’t need to be crafty at all to make them. I had the pleasure of helping about 80 women make them during the recent HP MyPrintly Retreat. They were then worn by everyone to Disneyland the following day.
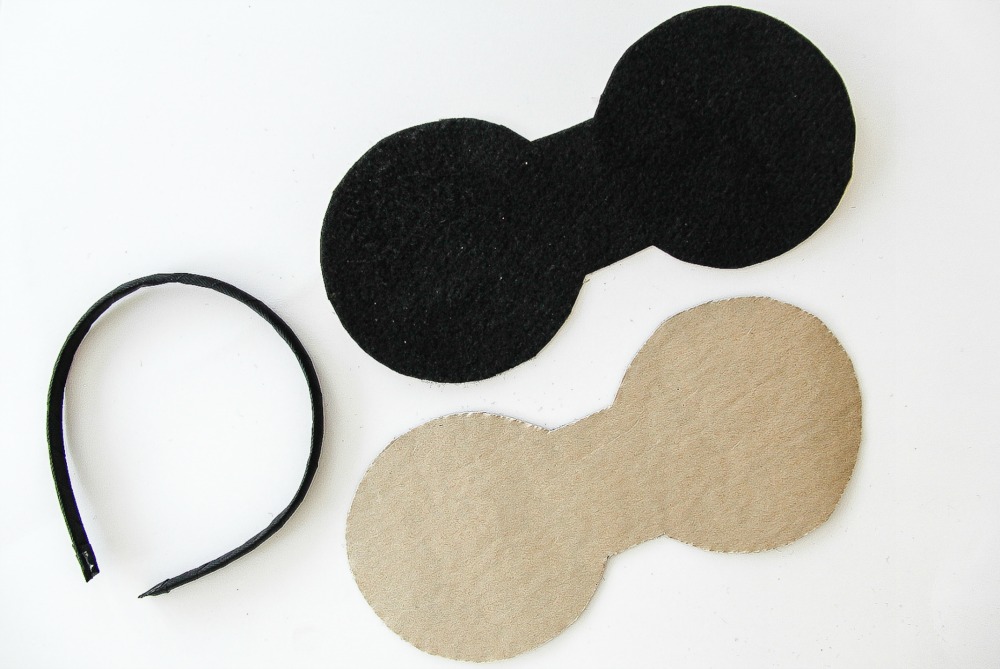
Supplies
- 1 black headband
- 1 sheet sticky back felt – black
- 1 sheet foam – silver
- 1 clear plastic badge
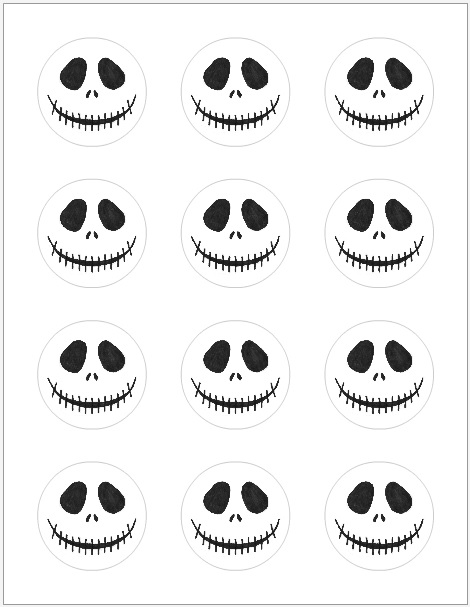
- Jack Skellington label – printed on Avery labels, download here.
- Hot glue
- Scissors
- Pencil
Instructions
My mortar was the perfect size for Mickey ears so I used that to make the ear shapes. You could try a small bowl though.

You need two sets of ears that look like this.
When attaching them to the headband leave about 1 inch between each ear at the center top of the headband. Get an idea of where you are going to stick them before removing the sticky back because once they stick they are not coming apart again.
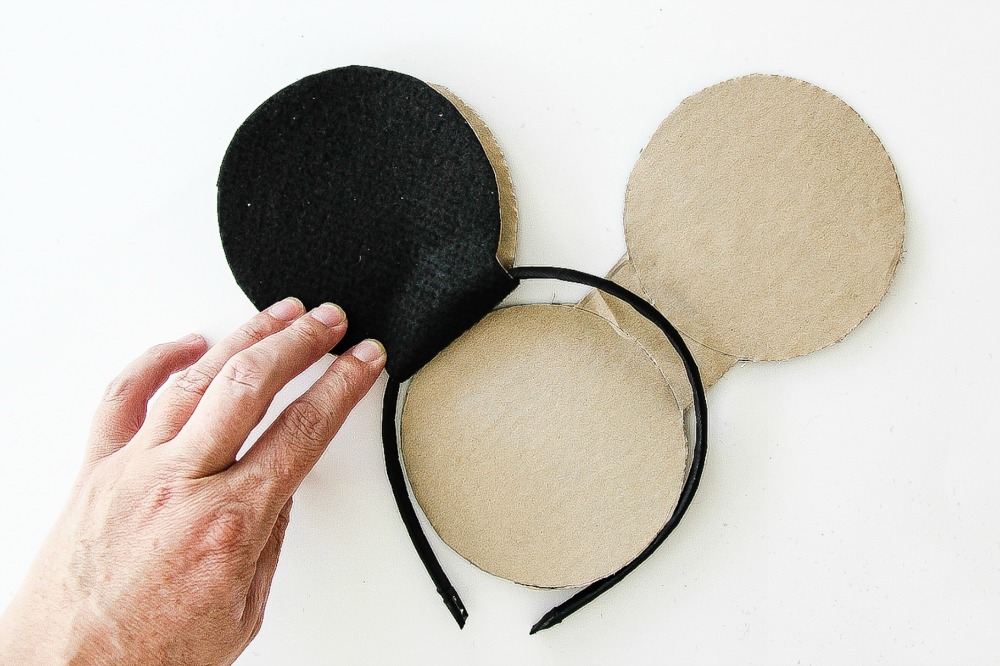
Once you have your placement, remove the stick back and wrap each ear around the headband. Work from the tip of the ear back down toward the headband when securing it place.
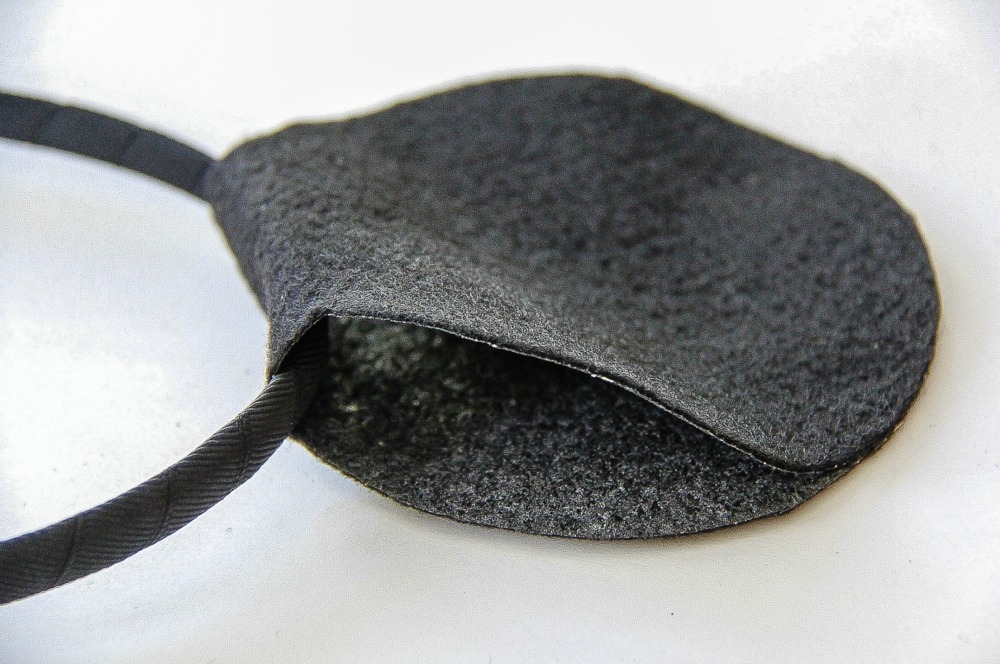
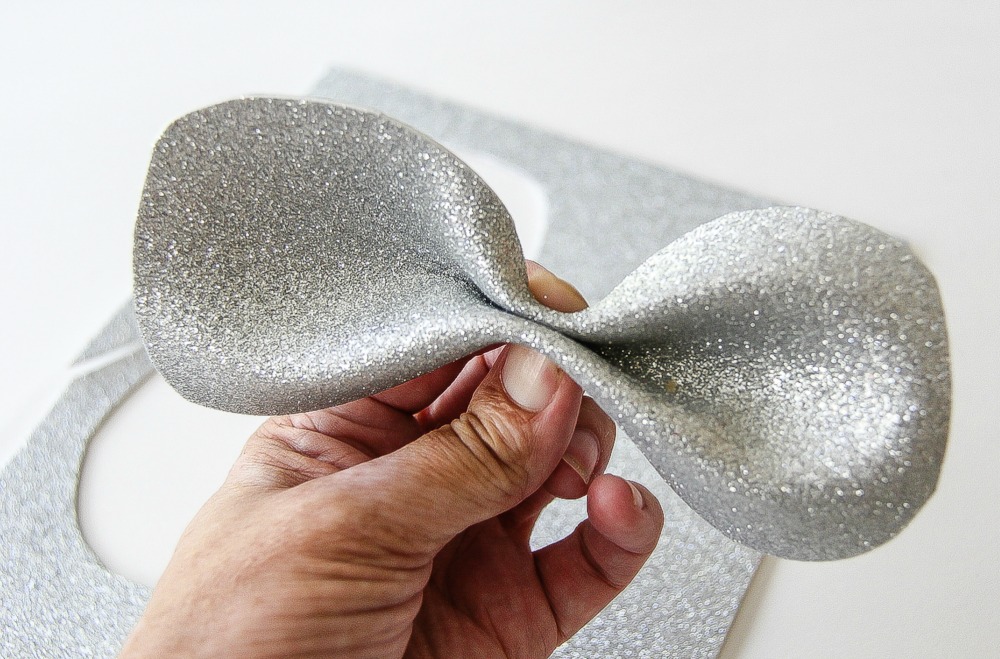
Once both ears are securely in place, cut a silver oval shape from the silver foam. It doesn’t need to be perfect, just make sure it’s narrower than the ears.
Fold over the edges in the center and scrunch it together.
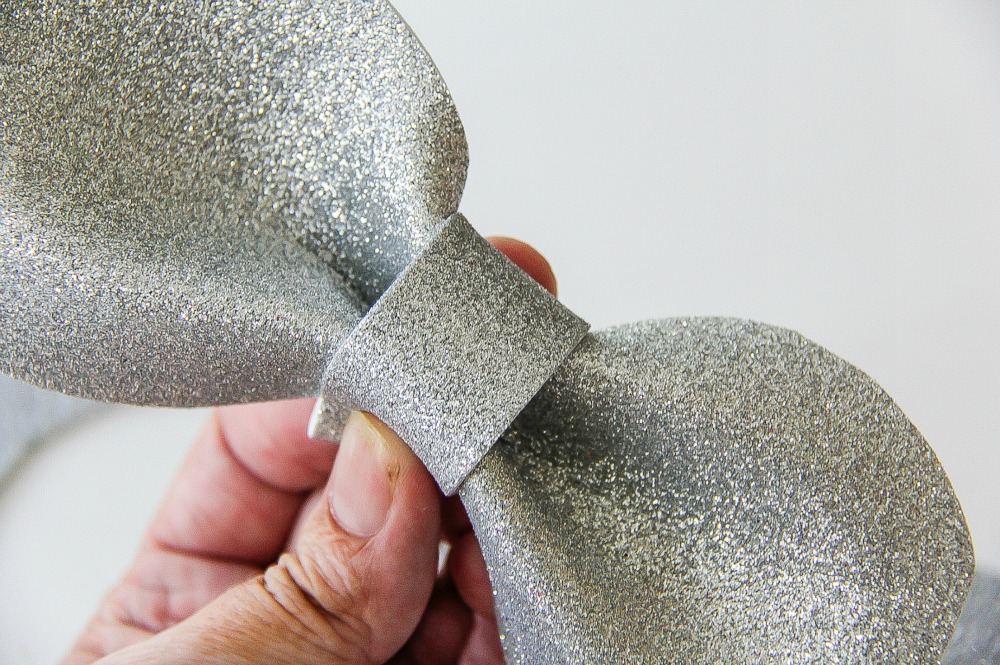
Cut another thin strip of silver foam and wrap it around the center securing it in place with hot glue.
Secure the bow in place to the headband using the hot glue. Also, add a little glue to each end and attach it to the ears. This will stop the ears from flopping over.
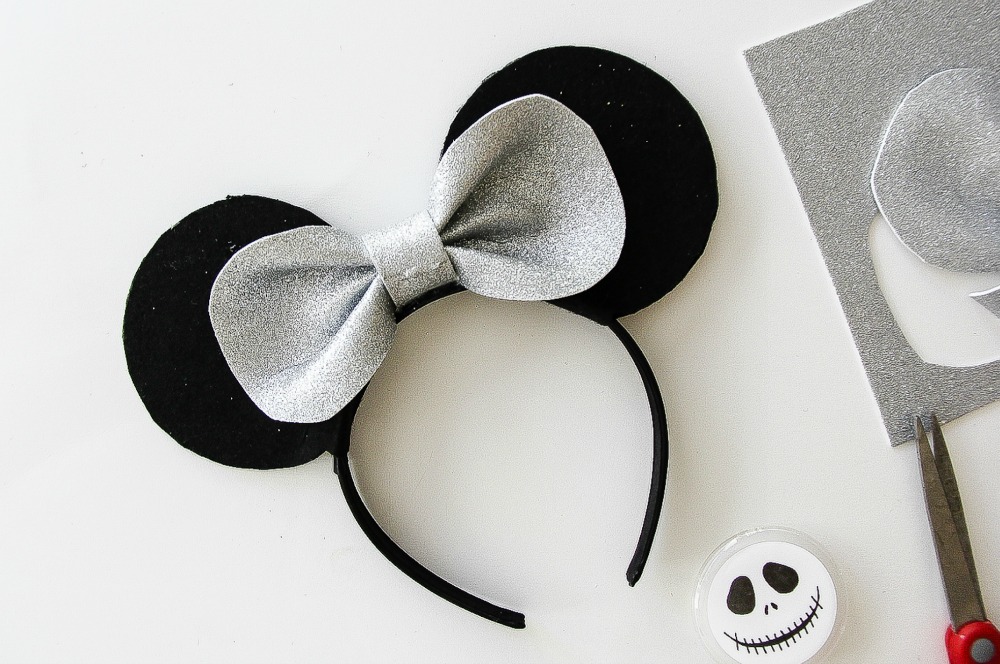
Download the free PDF of Jack Skellington labels, print on Avery labels. Pull the clear badge apart and place a label inside, secure the back on it again and thread it through the center of the bow to secure the badge in place.
Please pin this post for later:
1 comment
Thanks for sharing