We show you how to turn your favorite photo into a painting using Ohuhu Markers. These make wonderful gifts or hang them on the wall.
Disclosure: I received Ohuhu Art Markers to try at home.
As I mentioned above, I received a box of Ohuhu Art Markers to test out at home. The inner (and future) art teacher in me was so excited to give them a go. Although when a box of Ohuhu skin tone markers arrived I’ve got to tell you that panic set in. I much prefer to paint landscapes or objects; people have never been my thing. I procrastinated for about a week on how to go about using them, but I’m always up for a challenge, and seeing as I’m knee-deep in schoolwork studying to be an art teacher, trying a new method of art is both exciting and gets me out of my comfort zone.
On the Ohuhu blog, they have a step-by-step guide for using skin tone markers so that was my first step.
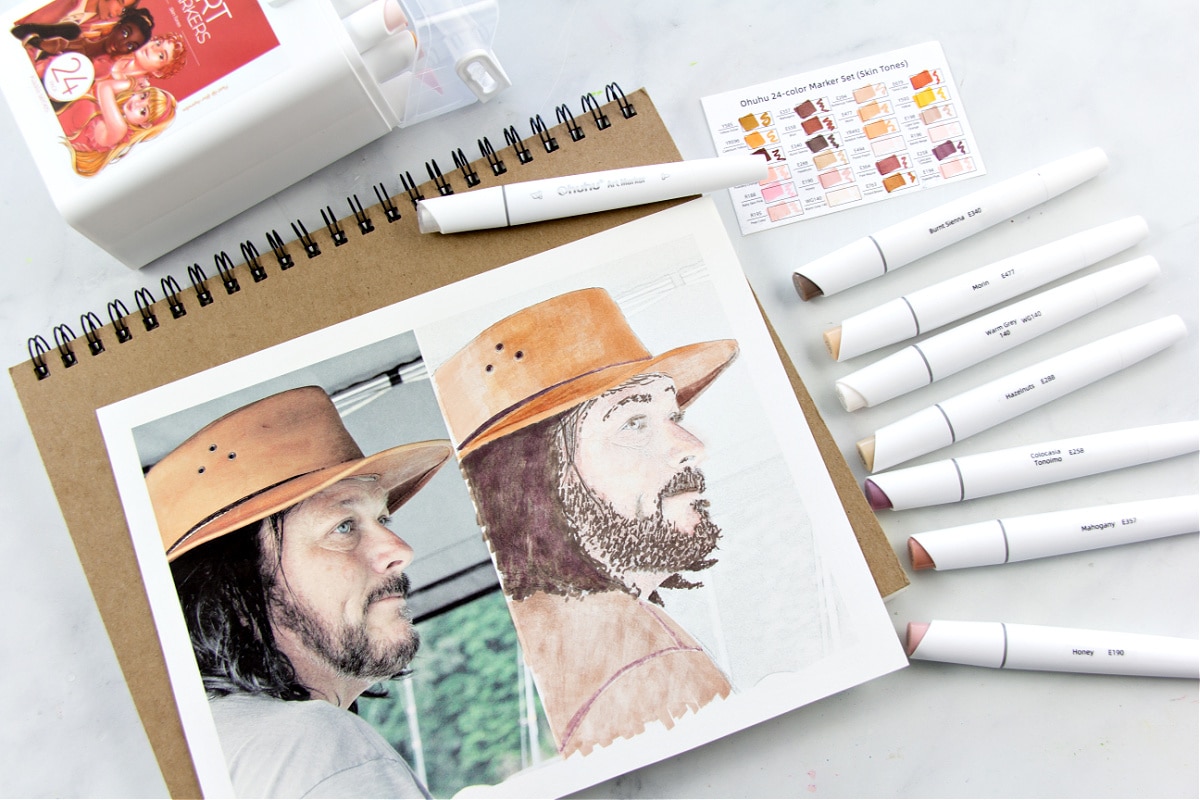
While I was showering one morning before work (where I do my best thinking) I remembered that I took a photo of Mike a few years ago (that I absolutely love) and had a lot of neutral tones in it.
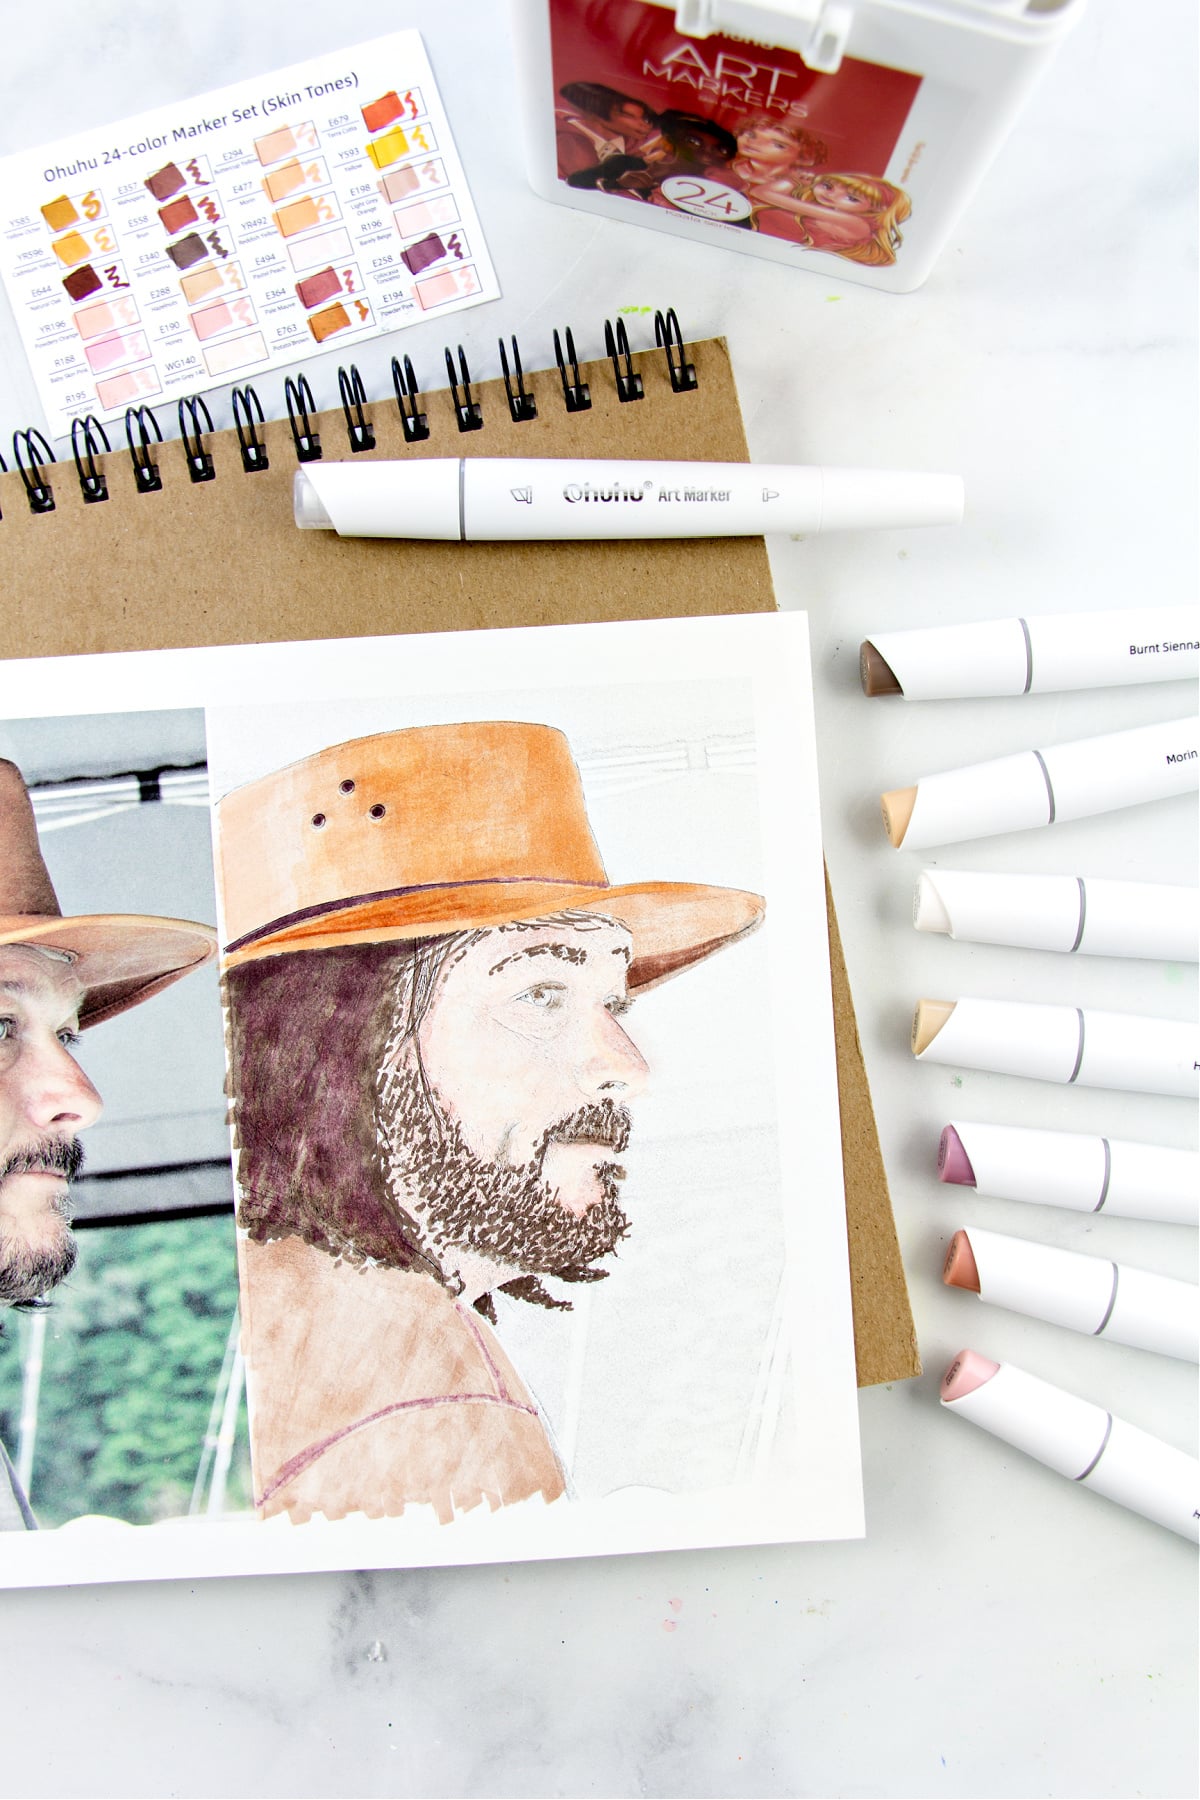
Photo to painting
What you need
- Art paper – I used watercolor paper because it’s what I had on hand
- Ohuhu Art Markers
- Ohuhu Honolulu Colorless Blender Marker
- Photo
- PicMonkey
- Printer
Instructions
The first step is to turn your photograph into a sketch. To do this I used PicMonkey:
PicMonkey.com > File > Create New (upload an image) > Effects > Edge Sketch > Apply > Download (save to your computer and print).
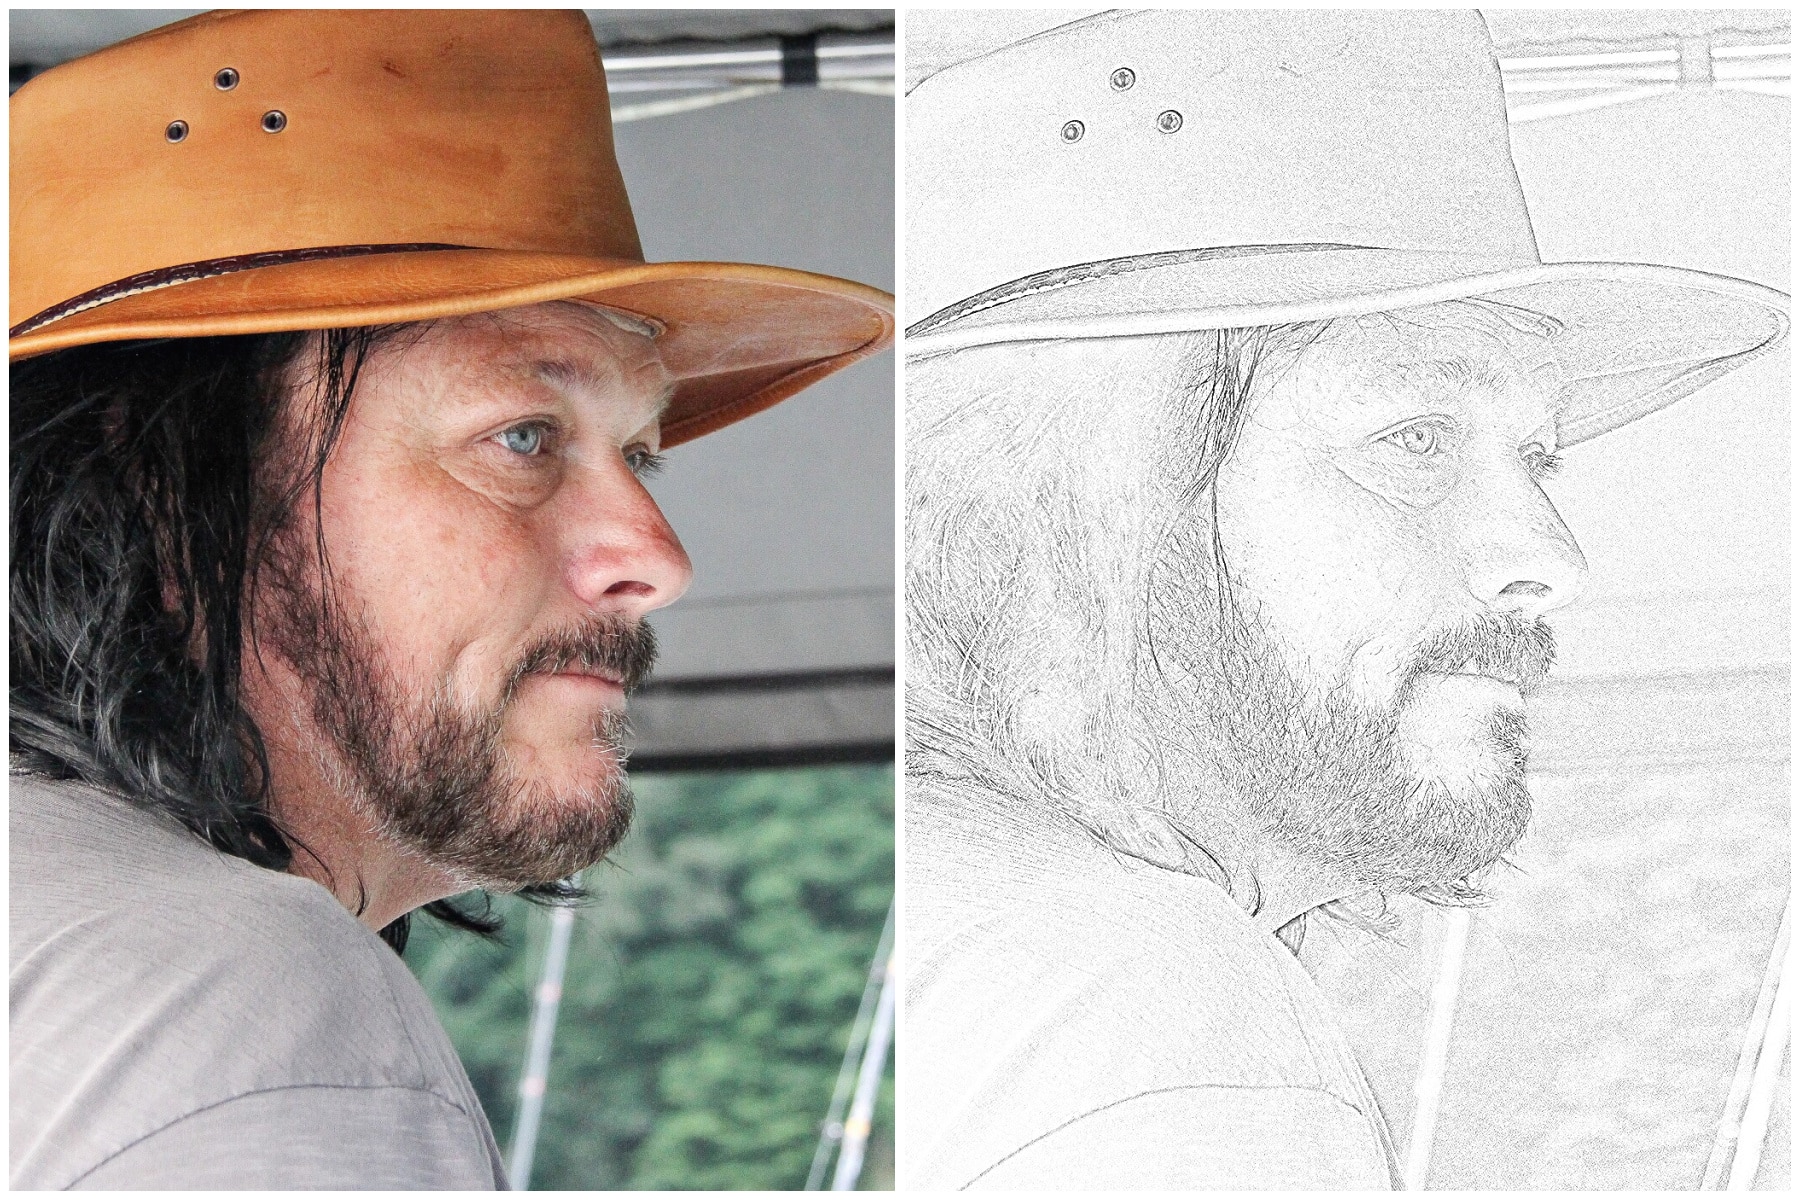
Note: Please only do this with photographs you have taken or have permission to use. We don’t want to breach any photographer’s copyright.
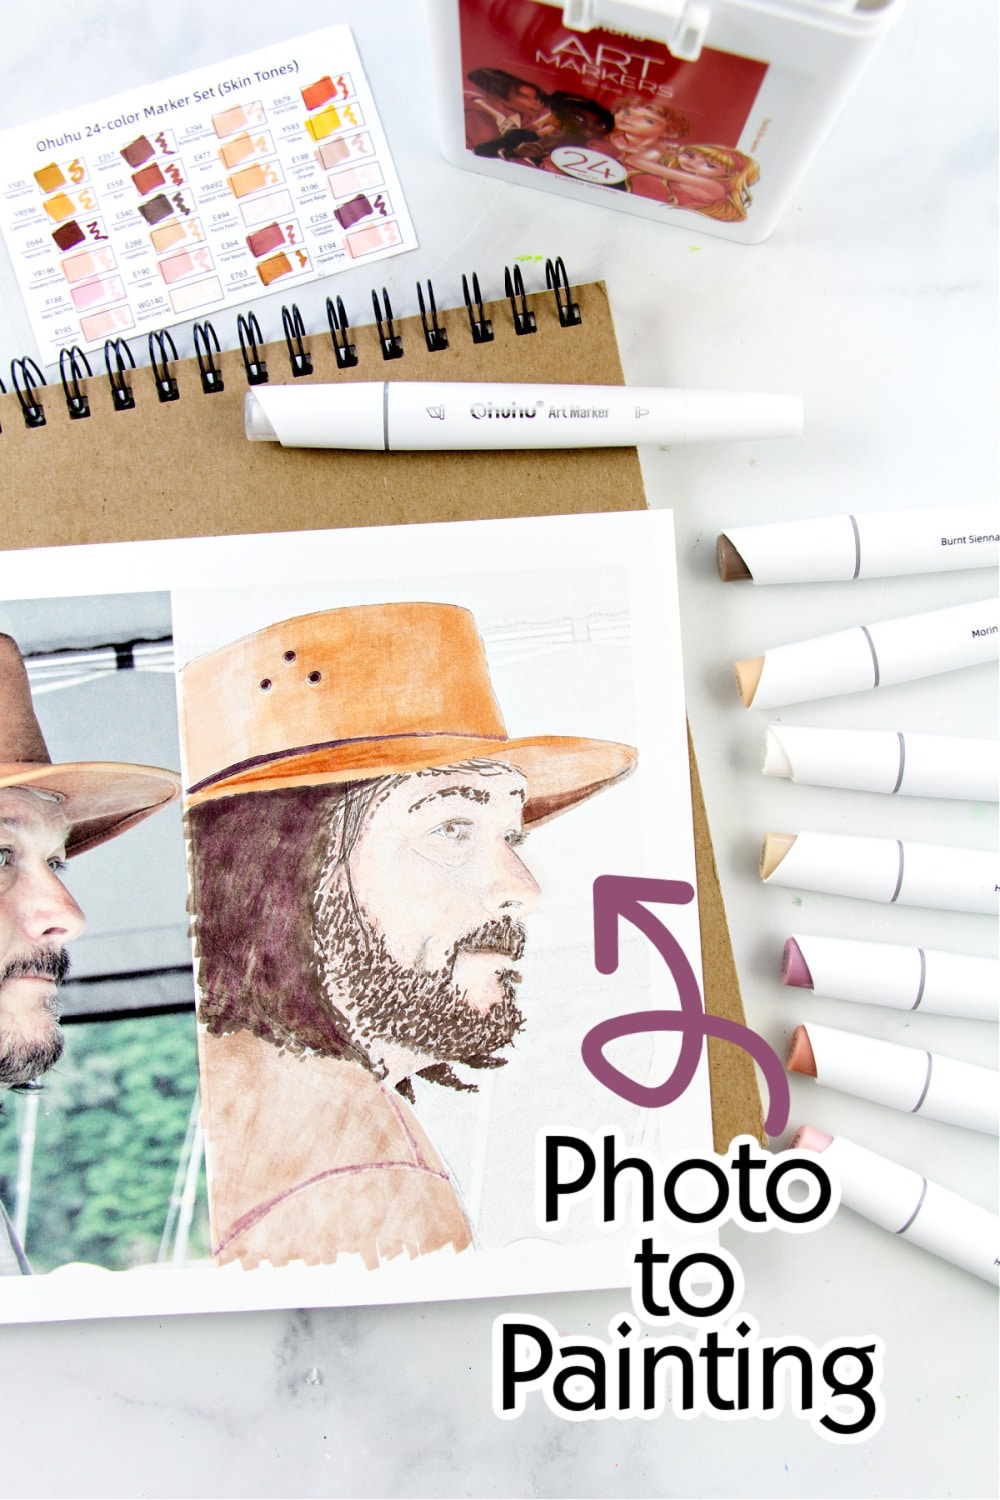
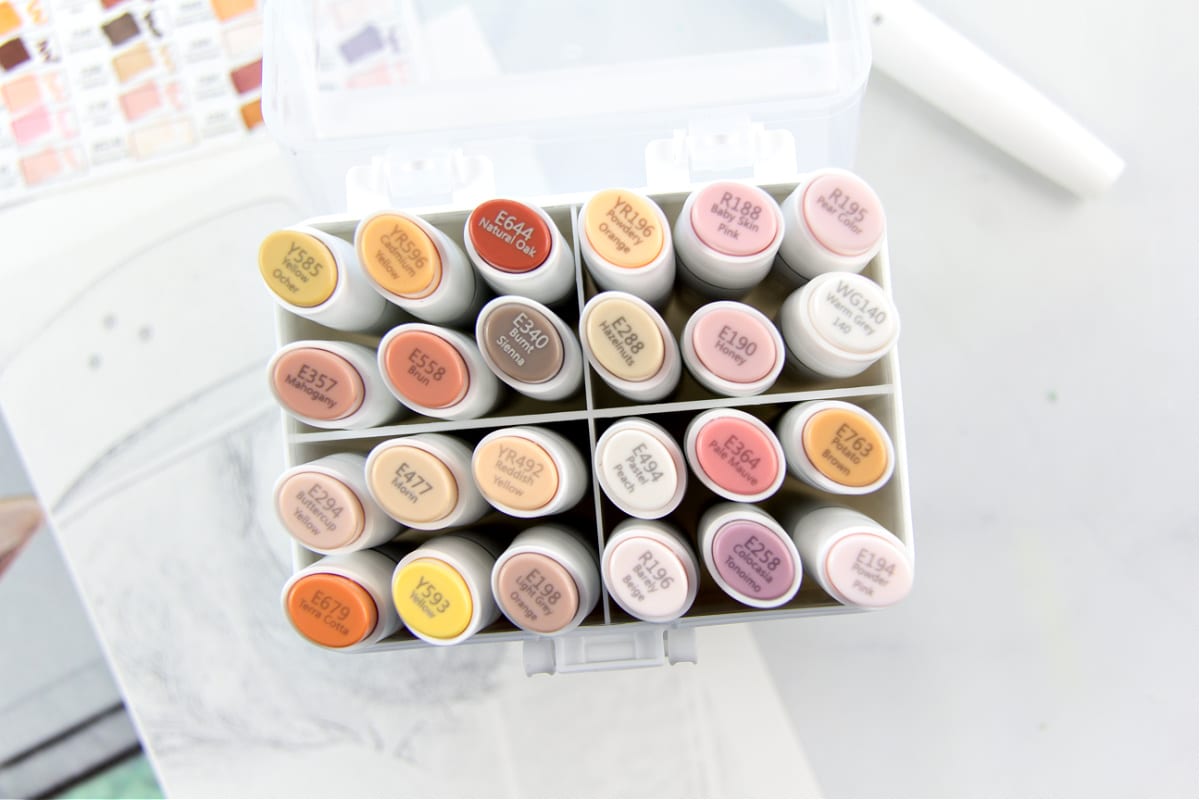
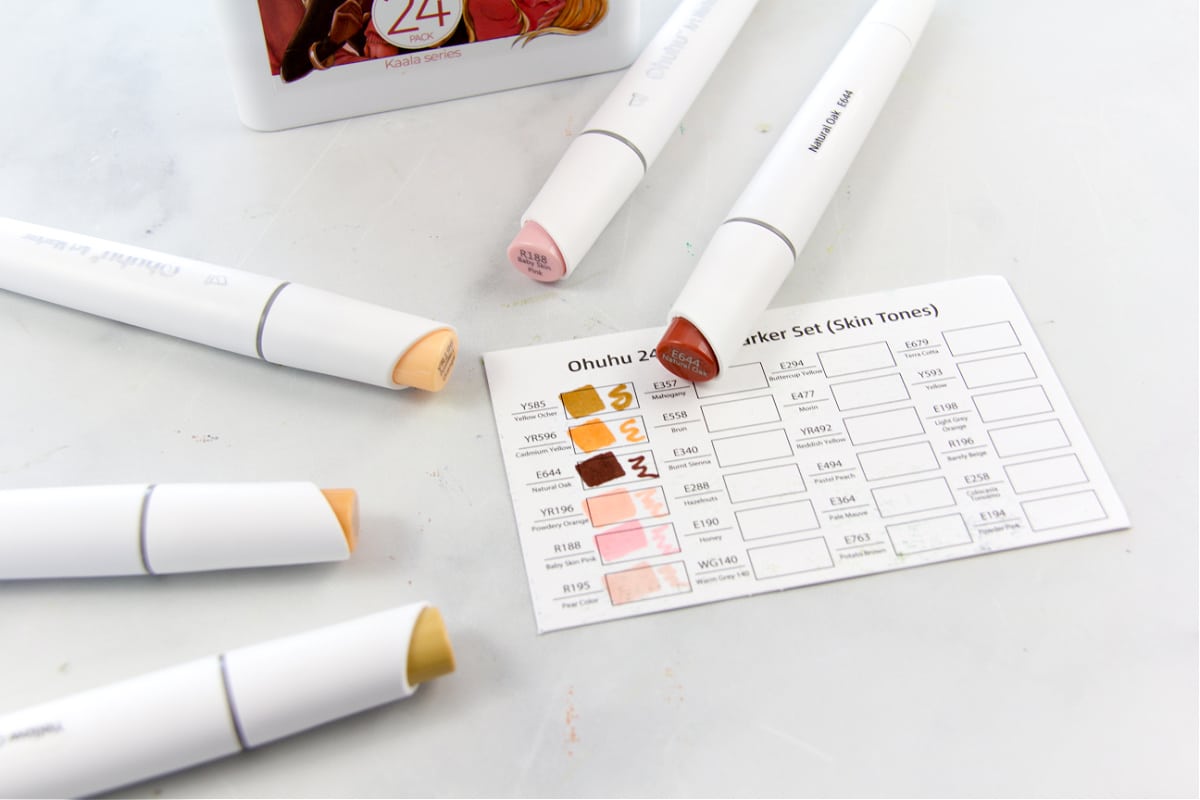
The next step is to test all of your Ohuhu Art Markers on a card so you know exactly what color they will turn out, which as you can see below can be slightly different from the lid color.
Now that you know exactly what shad each marker will turn out you can begin ‘painting’. Your markers have both a thick and fine point end. I took the advice I read on the Ohuhu blog and start with the lightest shades first and then worked through to the darker shades.
Here’s the best piece of advice I can give you. Use the Ohuhu Honolulu Colorless Blender Marker as you go. Not only does it help to erase, but it also helps to blend the different shades.
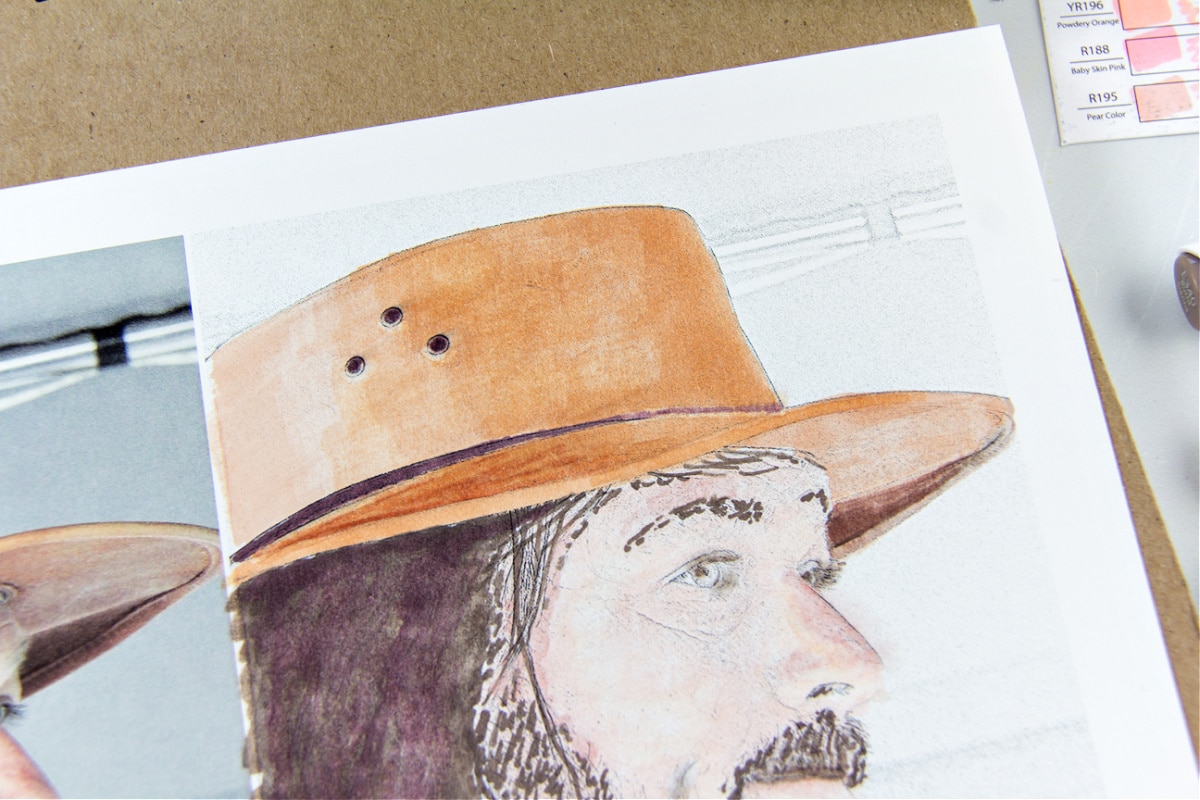
As you can see from the image above, I was able to use the blender along with several skin tone shades to not only give highlights to the hat, but also add coloring to the nose and around the edge of the face, and highlights on the cheeks and side of the nose just like the photo.
I need to collect more of these markers in a variety of shades and have another outdoor landscape painting day, but using markers this time.
Please pin this post for later