
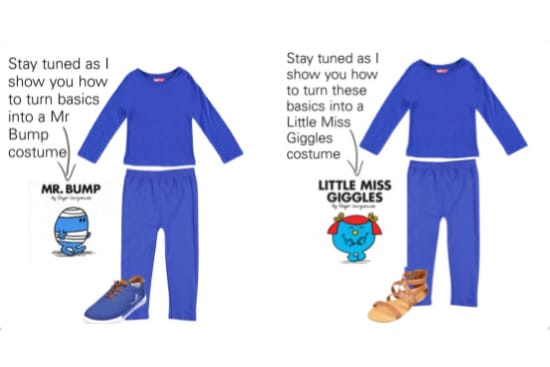
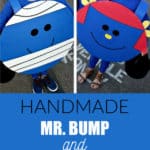
These Little Miss and Mr Men costumes are so easy to make and kids will love these costumes inspired by Mr Bump and Little Miss Giggles.
My kids absolutely love the Mr. Men and Little Miss books along with the television show. Of course, I love that they love it, seeing as it’s something that I grew up with.
They asked me to create costumes for them for Halloween, so after we went through pictures of each of the characters we settled on Mr. Bump and Little Miss Giggles.

Make Little Miss and Mr Men costumes
My next step was to go on-line at Cookies Kids and purchase the basic items I would need for each costume – leggings, long-sleeved t-shirt, and shoes. I prefer to purchase items that my kids can wear again, that way I’m not just spending money on just a costume, but also on everyday wear that they will get a lot of use out of.
I found most of the basic items needed such as leggings and tops, along with Flynn’s blue shoes at Cookies Kids.
Once you have the basics, the next step is to create a cardboard head for the character. I didn’t have any large cardboard boxes handy that I could use so I headed to Michael’s and purchased a couple of large royal blue Elmer’s tri-fold display boards.
The instructions below are pretty much identical to create each costume, you just need to change the facial features.
Supplies
- Large piece of cardboard (or Elmer’s tri-fold board in royal blue)
- Scissors
- Ruler
- Sharpie or paint marker
- Acrylic paint (white and blue) with a brush
- Duct tape in blue
- Pencil
Instructions
Step 1:

Begin by tracing around a large tub (or free-handing) a large circle on the back of the board. If you do not have a blue tri-fold board as I do, then you will also need to paint one side of your board blue at this stage.
Step 2:

Use the first circle as a template to make a second circle (one for the front, and one for the back of the costume).
Step 3:

On the front you are going to begin sketching where the mouth will go, and then rule the lines for the bandages. I found it handy to have my laptop close by with lots of images of Mr. Bump for referencing.
Step 4:

Using the white paint, fill in the bandages, you will need at least two coats of paint.
Step 5:

Using the Sharpie (or black paint pen) make lines for the bandages. Trace around a smaller circular object (I found a large paint bottle was perfect for this), then fill it in using the same marker.
Step 6:

Paint the reverse side of each circle. Set aside to dry.
Step 7:

While the head is drying, cut four strips approximately 1.5 inches wide from one of the side panels of the tri-fold board. Note: If you are making this for an older child or adult, you will need to cut longer strips. Attach the strips to both the top, and sides of the costume, ensuring that your child’s head can fit through. Reinforce it with duct tape.
Our finished Little Miss and Mr Men costumes

These two handmade Mr Men costumes were featured in a Fox Morning News Halloween costume segment.

Thank you Jasmine 🙂
So cute!
I love it!!!!
This is too cute! My husband would love this, lol! If I could only get him to dress up. Such a creative piece.
wow this is great for my child on world book day
tonya staab your epic
tonya staab your epic