
I am an avid follower of Craft Hope. You may remember this project I did to support one of their causes a while ago.
This time around we were sent on a mission (for those who chose to accept it) to make bean bags for the Liberia Orphan Education Project. I was more than happy to get on board with this. I love crafting for a cause and despite my children's protests, these bean bags did in fact make their way to the Post Office.

What you need:
- Fabric in 2 colors – I purchased a jersey knit fabric in turquoise and orange
- Interfacing – one that is light-weight and offers a lot of movement still.
- Filling for the bean bags
- Fabric off-cuts – any color but something fairly light-weight
- alphabet stencil and permanent non-toxic fabric marker
To make:
We had a choice of doing alphabet, numbers, colors or shapes. I opted to do shapes.
Cut squares in the primary color. You will need 2 squares per bean bag. I cut mine 5" (each side).
Using a template and a fabric marker draw the shape in the center of your square, then using sharp scissors, cut it out. You will only do this for the front of the bean bag, not the back.
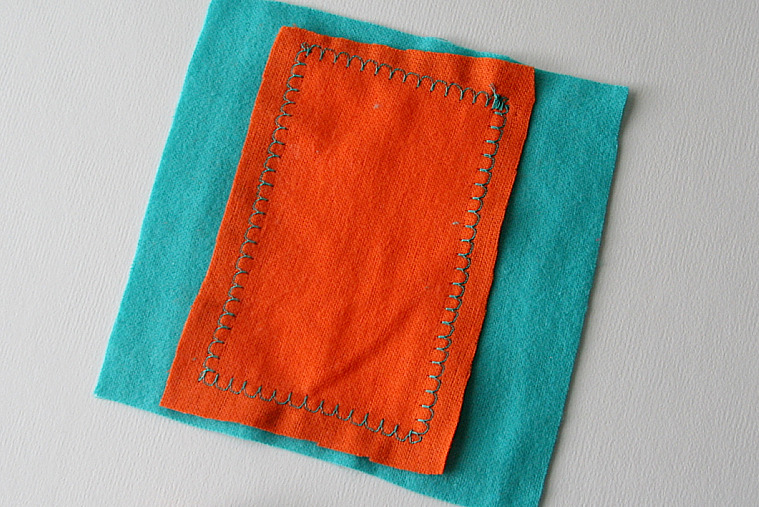
Cut a square from the second color and pin it over the top of the shape that you have cut out. Use an over-edge stitch to join the fabrics together. Stitch on the right-side (not what will be the inside – as shown in the diagram below, this was just to show you what the inside will look like).

Working with the 2nd square for the back-side of the bean bag. Stencil the word for the shape. Like this:

I was very concerned about the stitching coming loose around the shapes in the center, so to strengthen each I ironed a little interfacing to the inside of each square (front pieces only)

Now, put your front and back piece together with the right sides facing out and stitch 3 sides together using a straight-stitch. You need to leave one side open to add the beans. Put these aside for the time being.
My kids are fairly rough, so keeping this in mind I decided to make a pouch to hold the filling just in case any of the stitches came loose on the outside of the bean bag. We were asked not to use food such as rice or beans as a filling because these were being sent overseas so for safety I thought the added protection would be worthwhile.
It doesn't really matter how these look because they will be inside anyway. This is where your fabric scraps come in handy.
Cut out rough squares about 1cm smaller (all around) than the initial squares. Straight-stitch around the sides. Allow about 1 inch un-stitched to fill the bag. I used a small funnel and filled the bag with a combination of Bean Bag Plastic Pellets (I purchased the small bags for under $3 ea at Beverly's) and small foam balls – the pellets are quite expensive, but I've been told you can also use kitty litter or aquarium gravel.

Don't over-fill the pouches as you still need to sew up that last inch and don't want beans rolling into your sewing machine. You also don't want it too full because it will restrict movement.

Now, place a pouch of beans inside the opening of each bean bag and stitch up the last side. Trim away any jagged edges and you are done!
This post linked to:


As seen on:

So cute!
Look at you go. I’m thoroughly impressed!
Pretty colors & the lettering looks so perfect too. Thanks for linking up to Craftastic Monday!
I made bean bags for Craft Hope too! It was my first project and I’m now an avid follower too. 🙂
Hi! You’ve got a great blog here. I host a linky party every Tuesday called Tot Tuesdays. I’ve love it if you’d stop by and link up your great ideas for tots!
Cheers!
Jenn
I absolutely LOVE these! What a fun, simple idea!
Thanks for sharing! I love the idea of making these as gifts for kids or for my own kiddo too!
I really like these! Thanks for sharing … I’ve posted a link.
Thanks Jenn. I do love linky parties. I’ll pop over and check it out.
But considering pass after signing insurance contract longer and insurant commits suicide, majority is not the behavior that can foreknow when signing a contract any more.