
Make a DIY scrapbook album with our simple tips and ideas. We’ve got loads of ideas on how to fill the pages too.
Disclosure: I received a box of assorted scrapbook supplies from Staples.
Once upon a time (apparently when I was far more organized), I collected maps, theme park tickets, and other assorted items from vacations. I put them into brown paper bags, labeling each so that one day I could put everything I’d saved into scrapbooks.
I’ve been cleaning out our garage lately, a never-ending project with no end in sight. During this cleaning and organizing, I have come across some really fabulous things that I had completely forgotten about. Things like the box filled with brown paper bags, containing photocopies of photographs of my mum when she was little. I don’t even remember having seen these before and am still wondering how they got into this box.
Recently, I received a box of fun scrapbook supplies from the lovely folks at Staples. I didn’t even know they carried scrapbook supplies. So, I decided it’s probably about time I started putting all of those memories into albums (and get them out of the garage).
I haven’t finished filling it, but want to share the first album I made.
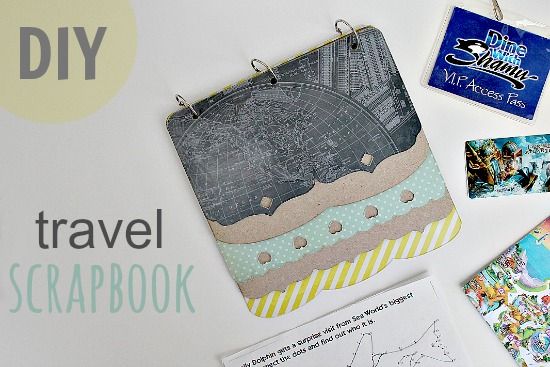
How to make a DIY scrapbook album
Supplies
In the box of supplies Staples sent me, there were a few fun items I could use:
- Clear Scraps Acrylic and Chipboard Album
- American Crafts (Studio Calico) ‘Abroad’ Collection Pack (scrapbook paper)
What you also need (which I already had, but that are available at Staples too):
- Book Rings
- X-Acto Knife
- Mod Podge
Instructions
Begin by choosing the scrapbook paper you want to use.
Lay the acrylic over the top, and very carefully cut around the edge using the X-Acto knife.

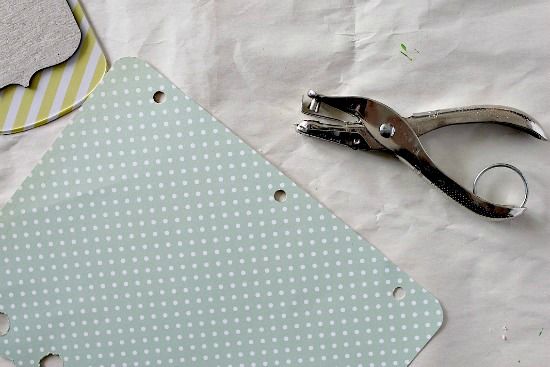
With a pencil, mark the center of where each hole is, and using a hole punch, punch the holes to match the acrylic overlay.
Brush a thin layer of Mod Podge over the front of the scrapbook paper and then lay the acrylic over the top. Turn it over and press out any air bubbles, smoothing over the back of the paper with a little pressure to ensure that the paper and acrylic are bonded. Set aside to dry. The Mod Podge will dry clear.
Once all of the acrylic sheets are completely dry, use the book rings to keep the album together.
How do you fill a scrapbook?
- Index cards are a great way to to jot down notes when you are on vacation. Hole punch them when you get home and place them directly into the album.
- Hole punch tickets or passes (particularly airline, theme park, boat rides etc) and place directly into the album, or alternatively, place them into small bags, or envelopes. You can stick these envelopes or bags onto index cards, or on plain paper and then place them into the album.
- Print photographs when you get home and type, or handwrite labels to go on the back of each outlining a special story behind the photograph, or where it was taken.
- Hole punch postcards of tourist destinations you visited and place directly into the album.
- Attach several small clear plastic bags, or alternatively sew strips of vinyl onto a piece of card stock to create pockets to store special little treasures such as a shell, sprinkling of sand, special coin, or a pressed leaf that was collected on your trip.
- Have the kids do special rubbings of textured surfaces, such as a brick, tree, or leaf to place into the album.
- You may even want to hole punch a napkin of a special restaurant you ate at.
- Hole punch maps and place them directly into the album. Mark off the locations that you went on your vacation. Place the map into the front of the album. Add a number sticker to each of the locations that you visited that corresponds with a page in the album where tickets, mementos and photographs can be found.
DIY Scrapbook album tips
The great thing about these albums is that you can use alphabet stickers, or stamps to label each chipboard or acrylic sheet to categorize each section of the album. You could do this by date, or by the place you went to.
Book rings (also called loose-leaf rings) come in a variety of sizes from about 3/4 to 3 inches. You may want to create a separate album for each of the kids to record their special moments and store keepsakes in.
Looking for more scrapbook album ideas? Try these:

Love love love this idea! We’re going to use it as a fast evening craft for falls end. A place to put some leaves lil twigs, & some photos we collected through this closing Autumn 2013.. THANK YOU!!!!