
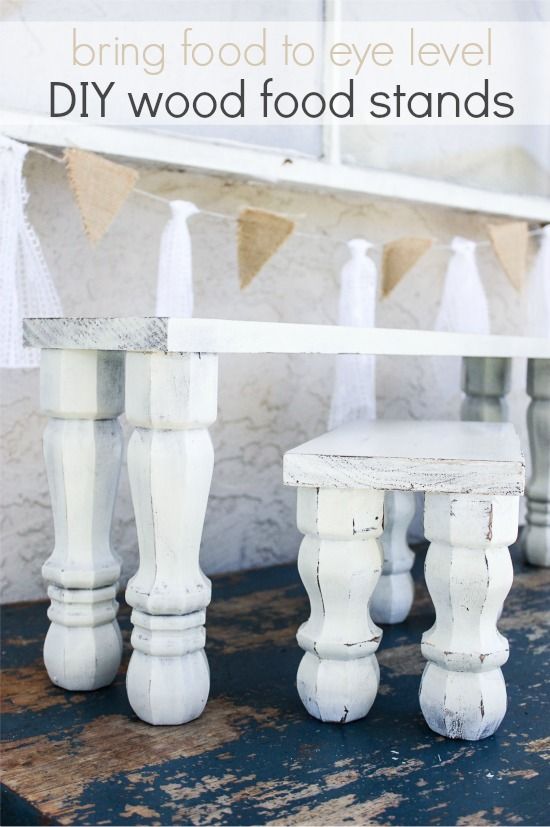
These DIY wood pedestal food stands will give you more space for food and beverages when entertaining at home.
Whether you are entertaining outdoors, or indoors, sometimes the space you are working with just isn’t large enough to display everything from food to serving ware and beverages. You don’t want to use too many different tables though, especially if you only have a small space for entertaining, and you need to allow space for guests to put down their beverages or plates. Even more so if you are hosting a sit-down dinner party and need to place the food down the center of the table without encroaching on guest’s dining space.
I’m going to share a tip for making sure food is visible and eye-catching, even in small spaces. Our goal is to not have all of your food at one level and filling a large space of your table, but to bring it all together in a stylish way, that makes it easy (especially for children) to see what is available.
I recently made these two small pedestal food stands.
They have since become two of my favorite items to use, not only for party tables, but also our dining table for dinner parties and food bars by the fire-pit for s’mores.
Supplies
- Wood in a variety of widths and lengths (depending on the space you are using)
- Unfinished wood legs – I found them in 9″ and 6″
- Wood glue
- Screws (if not already in the legs which ours were)
- Drill
- Paint – two colors, one for underneath and one for on top
- Sandpaper
- Mod Podge Outdoor
Instructions
My first stop was Home Depot where I intended to purchase wood off-cuts to use as the top of each stand. I found pieces of wood in various widths and lengths and settled on two pieces of wood in different lengths. After wandering around the store for about 30 minutes I came across unfinished wood legs in two sizes 9″ and 6″.
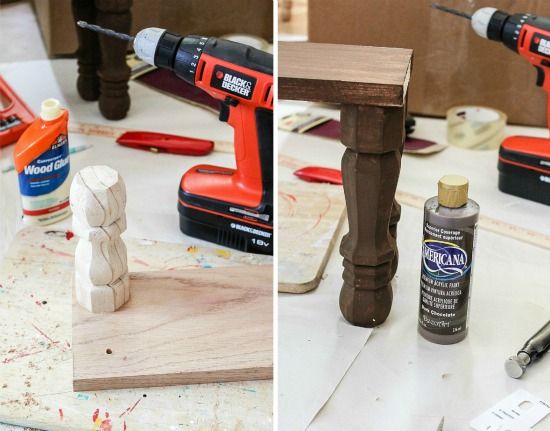
Once I got home though I whipped out the drill and set to work.
I found a drill bit that was around the same size as the screw already in the leg. After measuring and marking exactly where I wanted the legs to sit, I drilled small holes in the planks of wood. I then placed a little wood glue around the hole and screwed the leg into place.
Once all of the legs were screwed into place, I painted each of the stands with brown paint that I already had and set them aside to dry.
After they were dry, I took them outside and sprayed a couple of thin coats of white paint over the top. Then they were weathered with sandpaper.
Because these stands are being used for food and beverages, and spills are sure to happen, I applied three coats of Mod Podge Outdoor.
I first used these for our Despicable Me 2 party table.
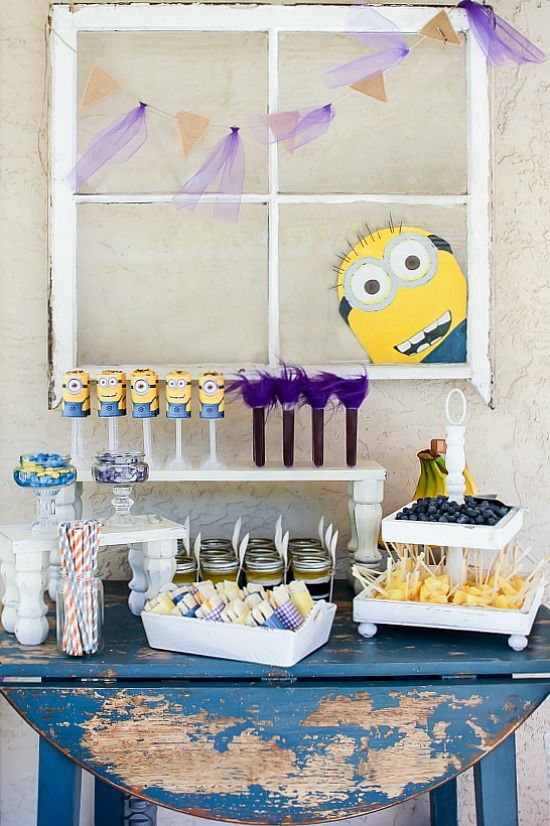
Can you see how they raise the food onto different levels so that everything is visible? Plus, they add extra space. You can see that the layered jelly jars are underneath the larger stand at the back, while still remaining visible.

They are so cute!! I love them painted white!!
xoxxo