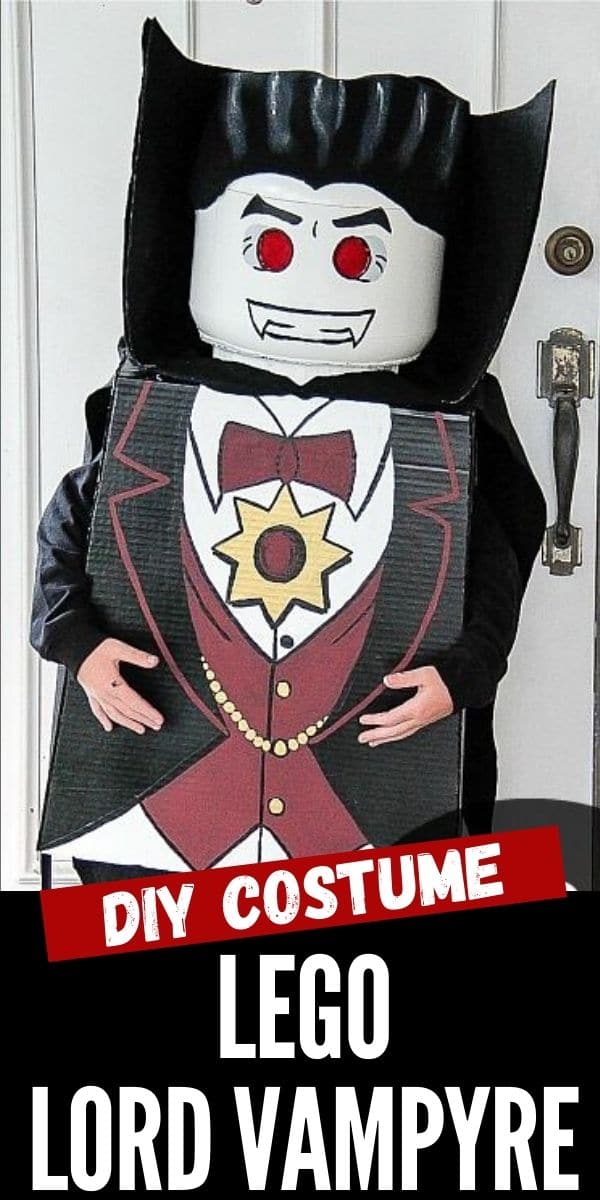
This DIY Lord Vampyre LEGO costume is perfect for your LEGO lover to trick-or-treat in this Halloween. You can wear it to Legoland too.
I’ve already shared Marisol’s Halloween costume for this year. I made hers first because it was easy.
I procrastinated over Flynn’s for weeks, after he told me he wanted to be LEGO Lord Vampyre. This costume sat in the too-hard basket and I was left scrambling today to get it made in time for the annual Fox 5 San Diego homemade costume segment tomorrow morning … if you are in San Diego, tune in around 8am.
I don’t know why I put off doing this costume though, I won’t pretend it was easy, because there was a bit of trial and error, but I was able to put it together in about 6 hours.
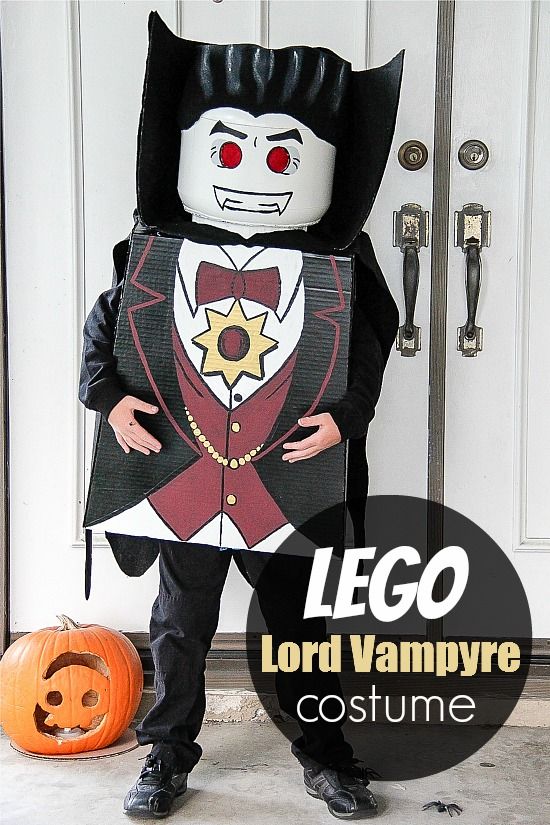
Lord Vampyre LEGO costume
Supplies
- LEGO sort and store bin
- 2 Elmer’s tri-fold boards (48″ x 36″)
- Stiff black felt (approximately 1 1/2 yards)
- Double-sided fusible ultra firm stabilizer (approximately 1/2 yard)
- Hot glue gun – and lots of glue sticks
- White spray paint – for plastics
- Black spray paint
- Acrylic paint – burgundy, black, gold, grey and white
- Red netting or tulle
- Masking tape
Instructions
Make the LEGO costume head
The first step was to cut eye holes and then to cut off the bottom of the storage bin so that Flynn’s head would fit inside.
At first, I was a little disappointed that there were sorter trays inside. Once removed, it left a gaping hole in the back of the storage bin. However, I sat down and came up with a plan and realized this would actually work in our favor because more air would be able to circulate inside. Plus, the gap would be hidden by the cape.
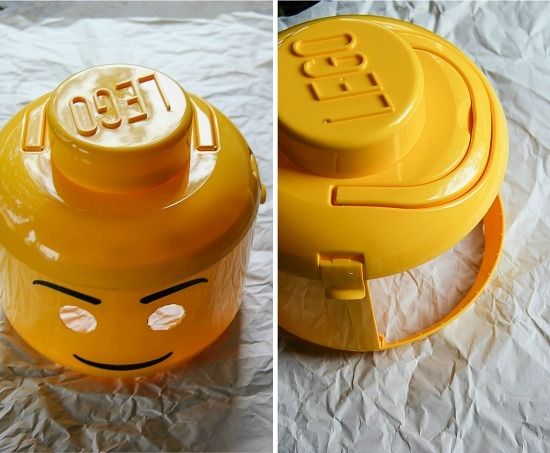
Paint the head white, and then paint the facial features once dry. Attach pieces of red tulle or netting inside the eyes with tape or glue.
Note: I folded it over 4 times to make it a little thicker, but he could still see perfectly well through the holes.
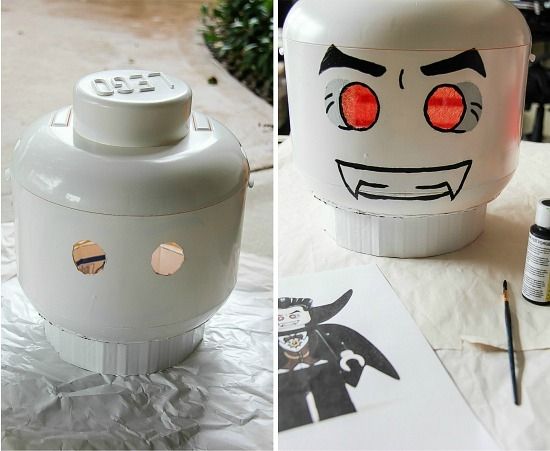
With the scraps of felt and stabilizer left make the hair. This was a little tricky, but with lots of hot glue, you can make it work. Sketch the front peak and the section across the forehead onto the stabilizer, cut it out and then attach the felt with hot glue, cut that out too. Attach it to the front of the head with hot glue. Pull it back in the center and attach it to the top of the head with glue and then work on the sides, wrapping it around at the back, but leaving the opening in the back uncovered so that air can still circulate.
Paint grey and white streaks on the top of the felt so that it looks more like Lord Vampyre’s hair.
Make the LEGO costume body
Lie two tri-fold boards on the floor and place the head carefully on top so that the joining edges of the boards run halfway through the head. Trace around the base of the head so there will be a semi-circle on each tri-fold board. Measure the shoulder width, adding on just a little extra. This section will be folded over and the head attached later.
From the markings you made on the shoulders sketch the front (or back) of the body making sure that it tapers out slightly. You will need to do this with both tri-fold boards so you have two pieces.
Bend the top section for the shoulders and join the semi-circles together using hot glue and then reinforce on the inside with tape.
You will now need two matching side pieces. Attach these with hot glue and then reinforce them on the inside with tape. Cut out the armholes and spray the entire body with black spray paint.
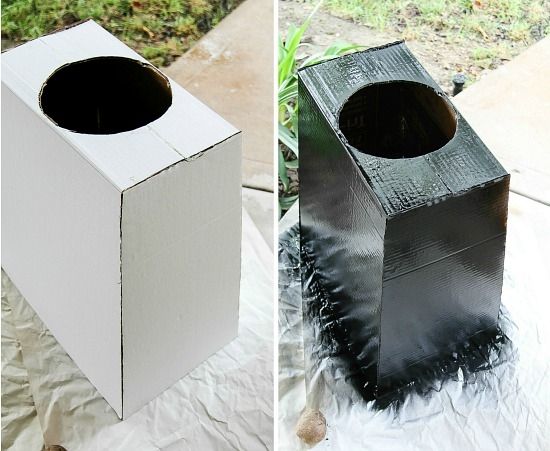
Note: I hadn’t cut the holes out before spraying because Flynn was still at school and I wanted to measure them before cutting.
Paint the details on the front of the body and set them aside to dry.
Place the head inside the hole at the top of the body and hot glue it in place, both on the inside and outside.
Attach the bottom of the cape in place with hot glue as well, pulling it around the neck and securing it in place. The last step is to hot glue the top section of the cape into place.
Fox 5 San Diego morning news feature
Both Flynn (in his LEGO Lord Vampyre costume) and Marisol (in her Despicable Me costume) were featured on Fox 5 San Diego morning.
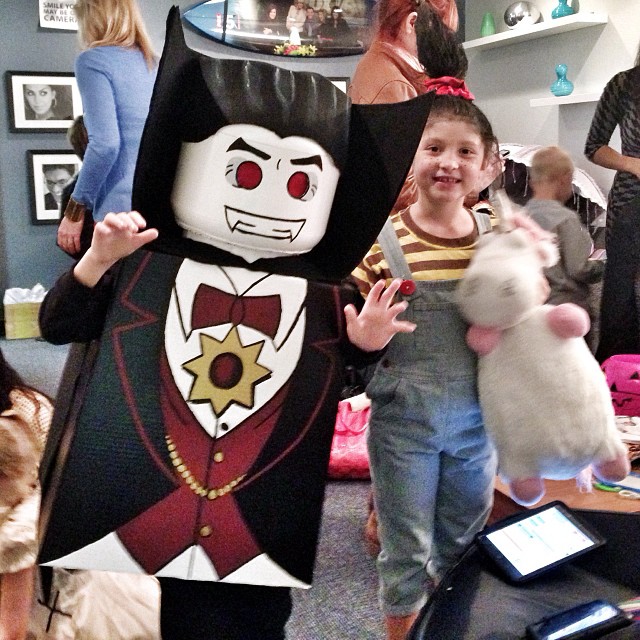
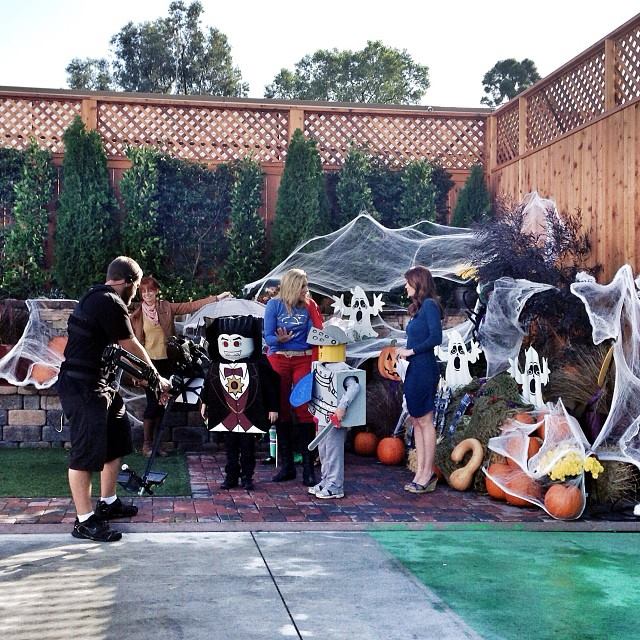
Check out our costumes category for even more DIY costume ideas.
Please pin this post for later:


It’s AMAZING!!! The detailed painting blows my mind and the little guy inside couldn’t be cuter~
Thank you Jillian 🙂
That’s adorable!! I think my son would want to wear that every day!! ha/ha
This is awesome! He must be so excited with his costume, love it!
Found you through Craftgawker – I LOVE this!! Great work.
Thank you Kat
I’m totally blown away. This is AWESOME!!!
Thank you Lori 🙂
We drilled a hole and then used a narrow hand saw to cut out the eyes.
this is so cool! My son saw that and he wants the same thing, how did you cut the eyes out?