
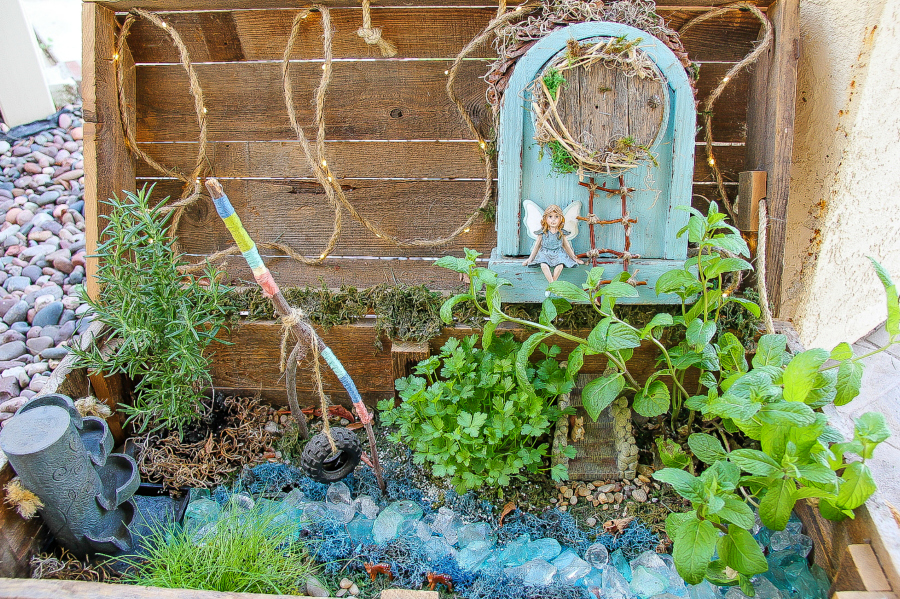
Turn a vintage wood box into a herb fairy garden with fairy lights and a fountain using this step-by-step tutorial.
If you are renting (like we are), then you have to think outside the box when it comes to making your outdoor space look pretty, and do those things that the kids really want. Marisol had been asking for THE LONGEST time for a fairy garden, but keeping in mind that moving house is on the horizon, Mike and I decided to make something that could move with us.
So, while the kids’ were visiting their dad one weekend, we set about building Marisol a fairy garden. Because that’s apparently what one does on their kid-free weekends. We had already taken her shopping for a few trinkets to put into the garden so she knew that it would be happening … eventually. We found some very sweet pieces one day when we were hanging out in Old Town Temecula at The Gardener’s Cottage and then found even more pieces at Michael’s where they have a whole section for fairy gardens, even for holiday’s.
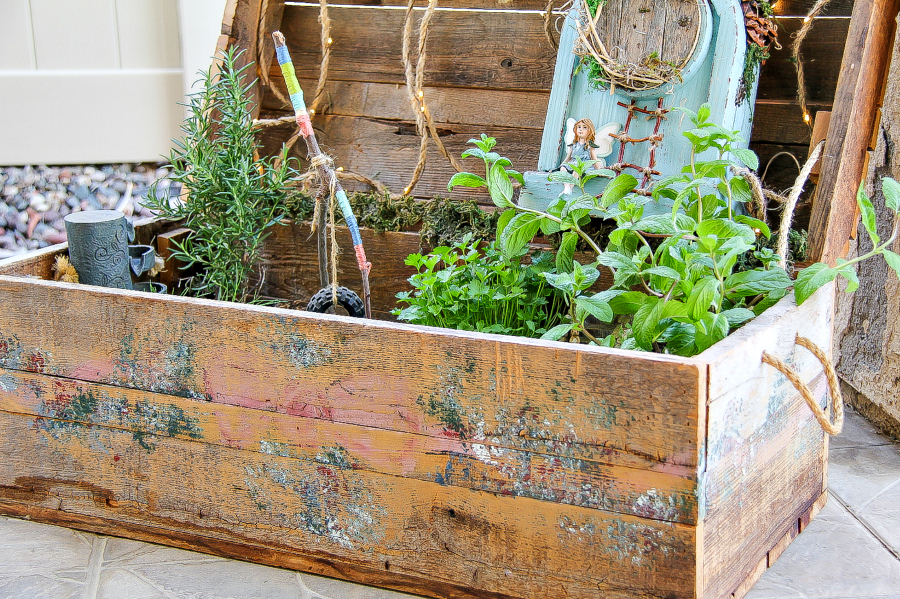
Our first step to building the fairy garden was to find the perfect vessel to contain it. Our initial thoughts were a large metal tub or old wheelbarrow, so we headed to a local antique store Granny’s Attic (seriously, the best place around – I also bought a lot of the stuff for Marisol’s styling station from there too).
When we stumbled over a vintage, rustic wood box we knew we’d found what we were looking for. And then, we came across the shell of an old clock too that someone had turned into a little cabinet that we thought would make the perfect fairy home.
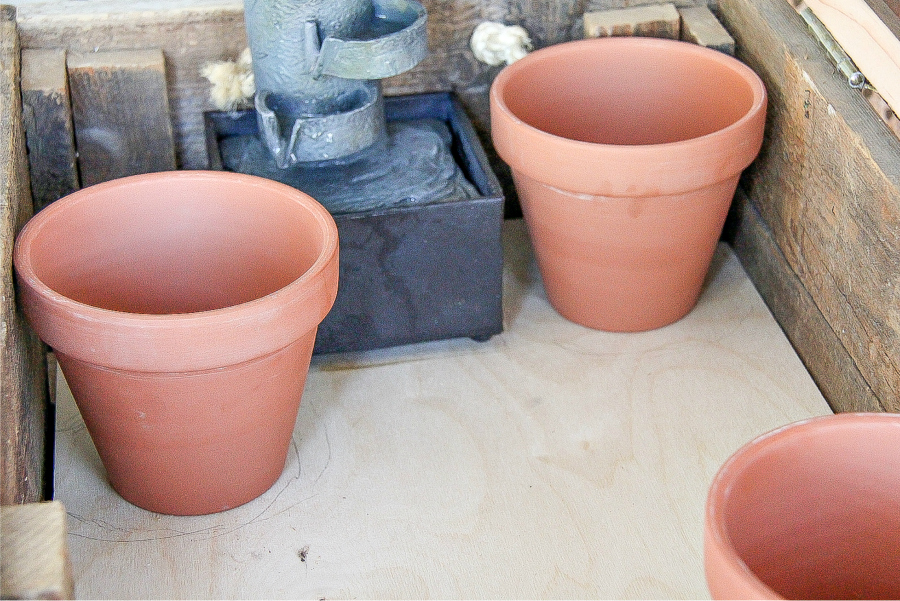
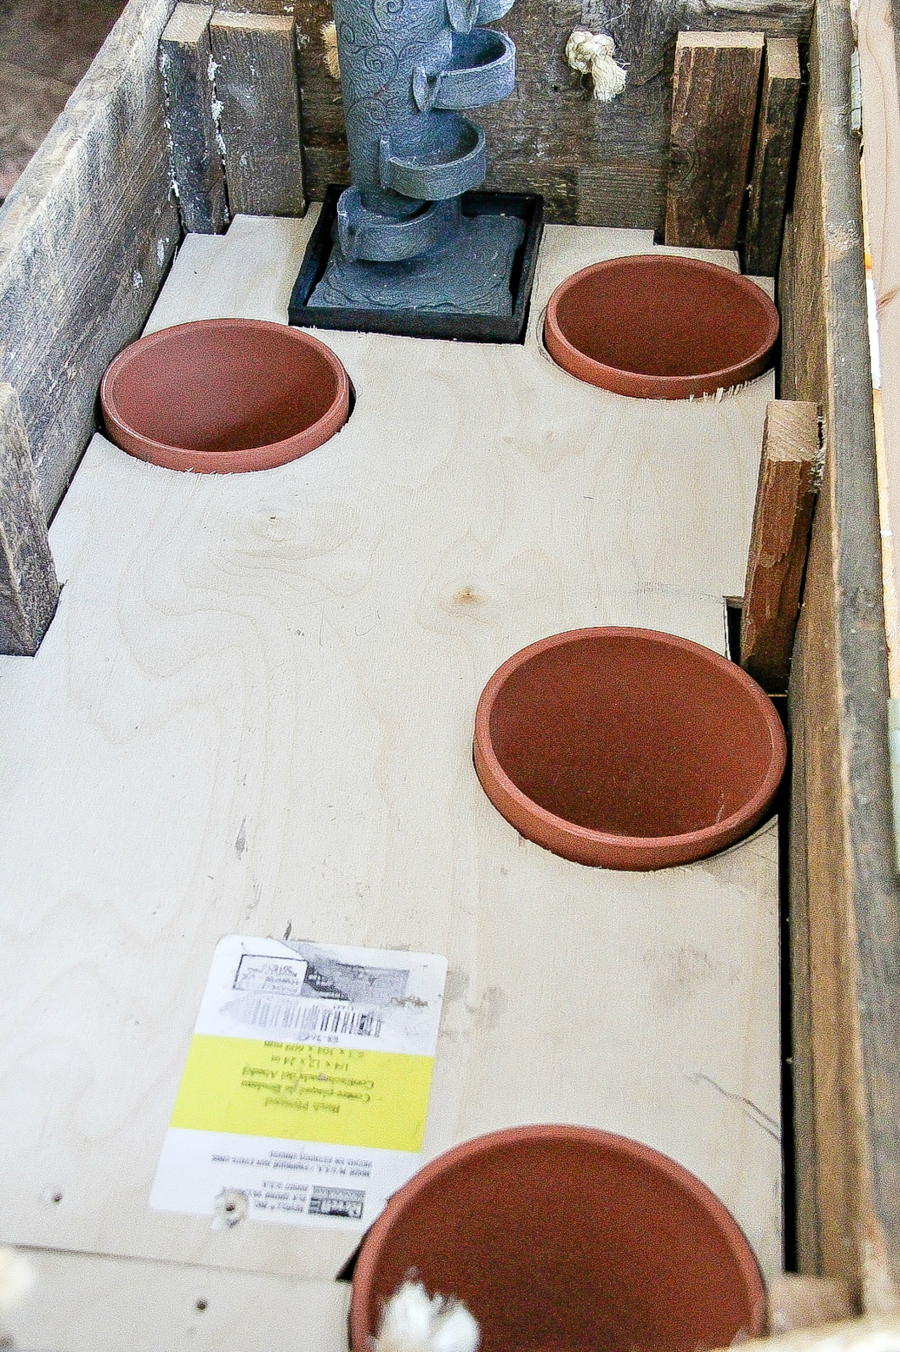
We then stopped at the hardware store for pots and wood. I knew I’d kill a lot of plants that ended up in this little garden so knew I’d need to change them over frequently (you’ll find two lots of different plants in these photos alone because I killed the first lot after taking the initial lot of photos). We decided the best way to change everything out was to have a platform inside the box that the pots would sit in and I could just pull them out quickly to change over the plants and pop them right back into place. So this is how we did this …
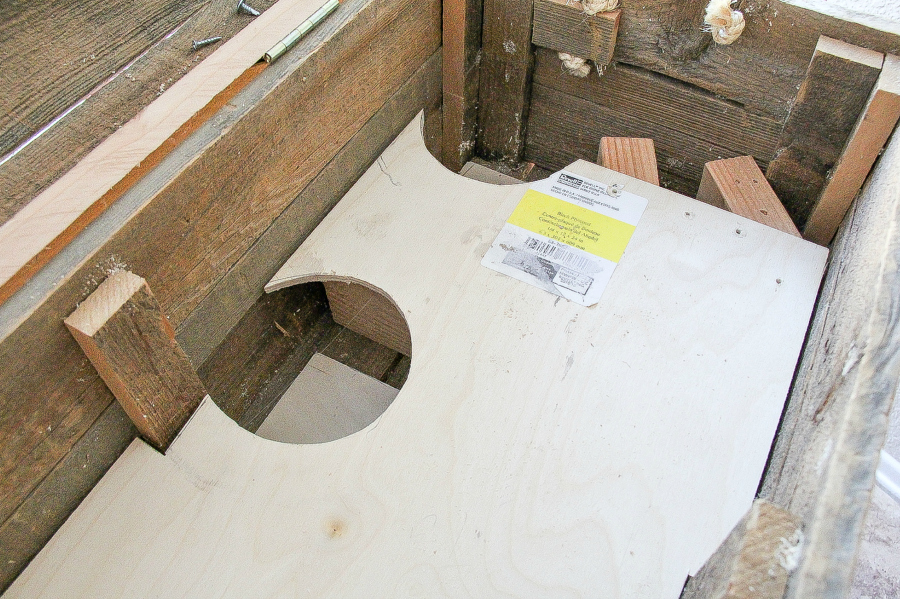
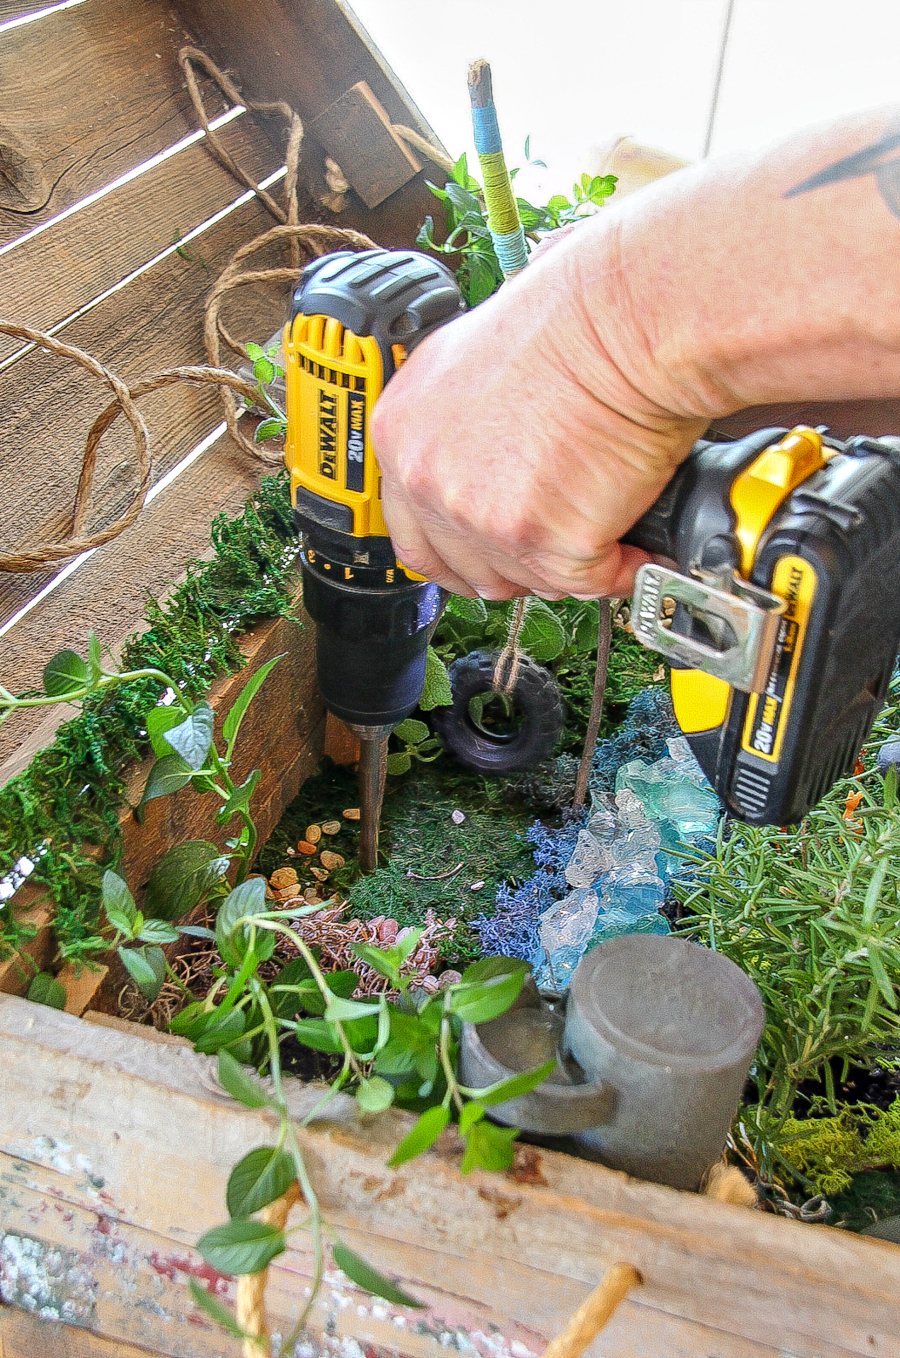
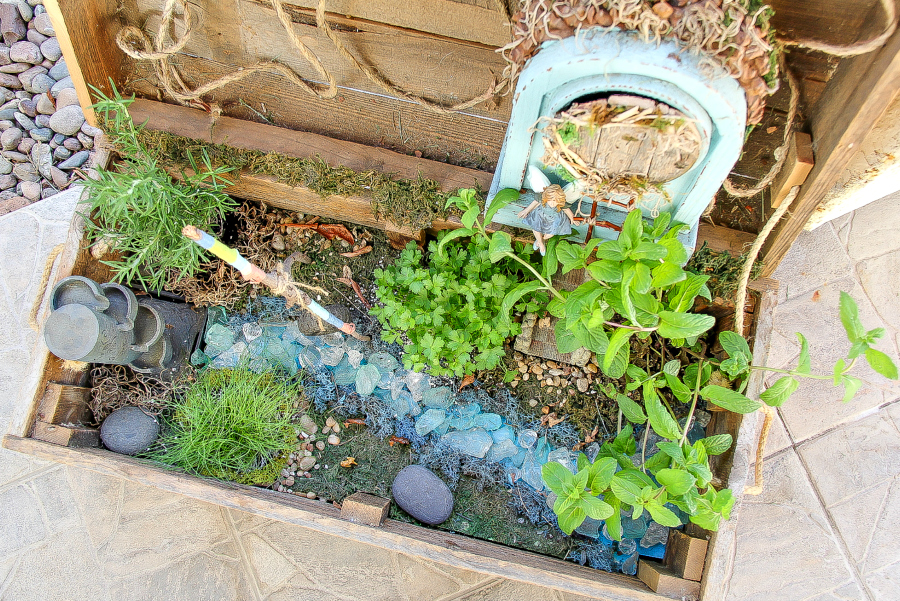
The first step was to cut a platform and put it into place on stilts inside the wood box. We had to make it just high enough that the pots would sit inside and only just barely touch the bottom of the wood box.
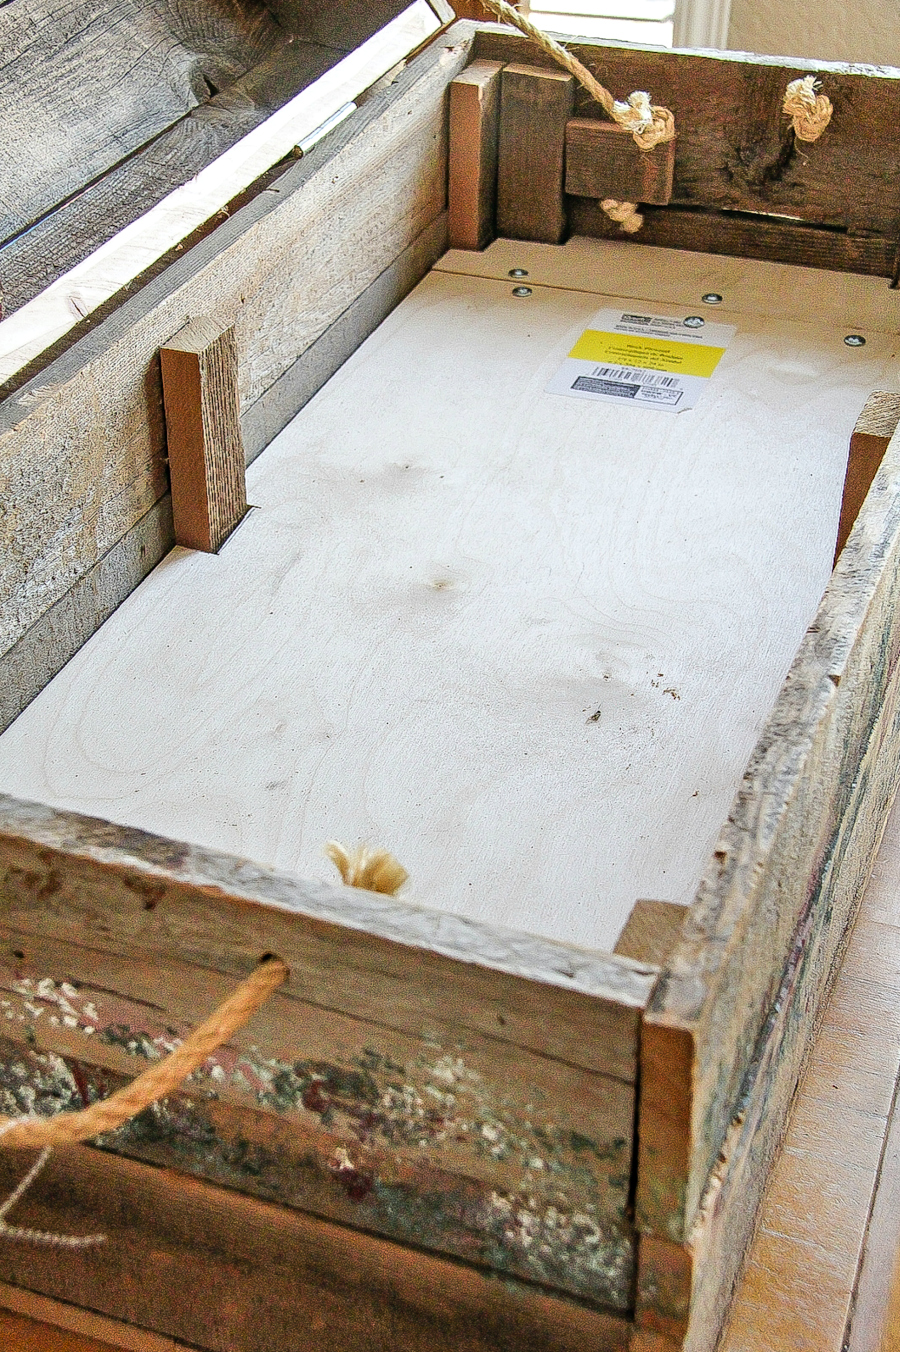
We then placed anything that would be sitting inside the platform onto the wood, drew around it and cut those sections out using a small saw.
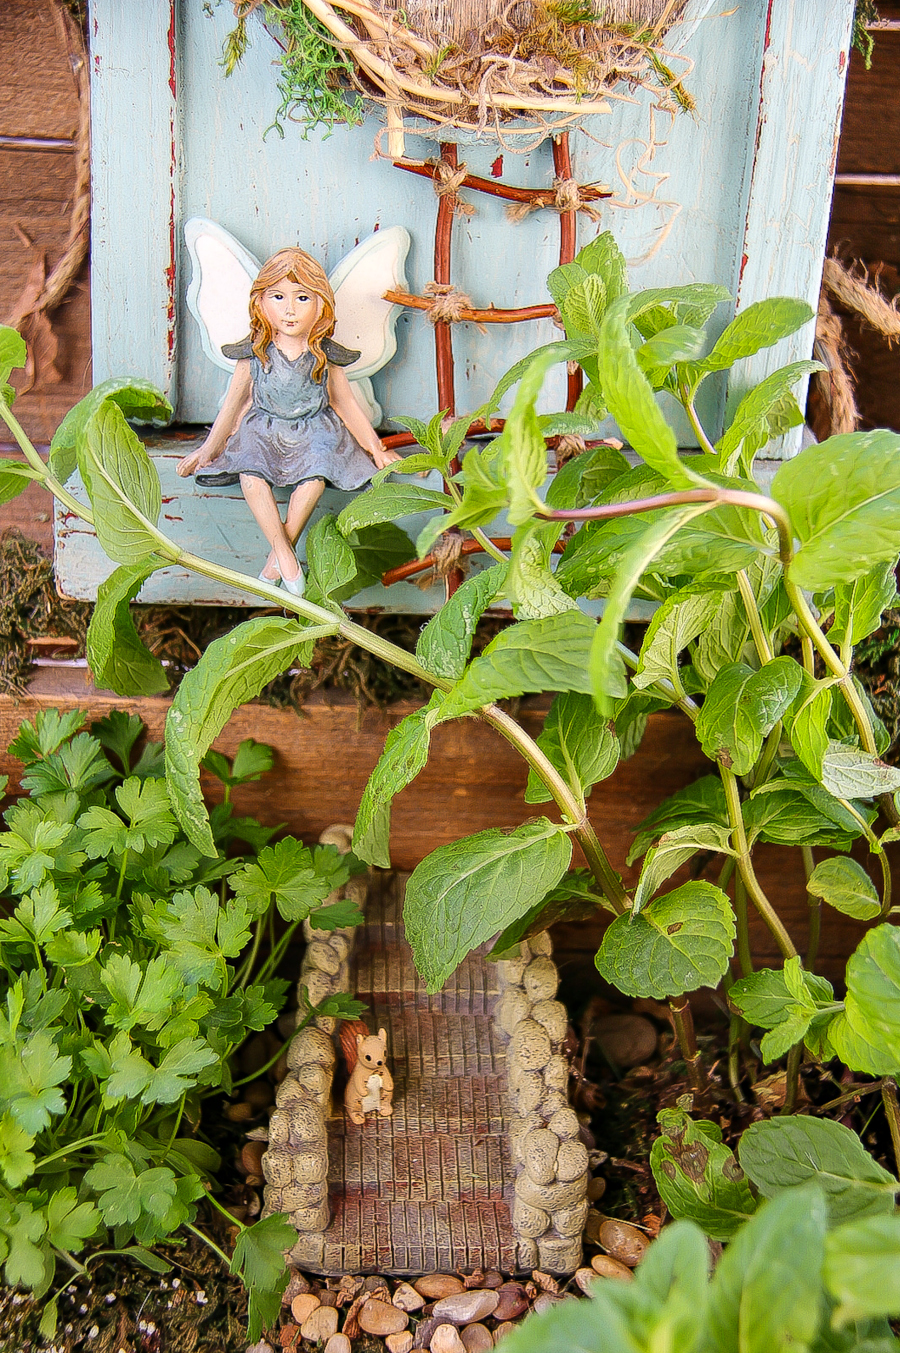
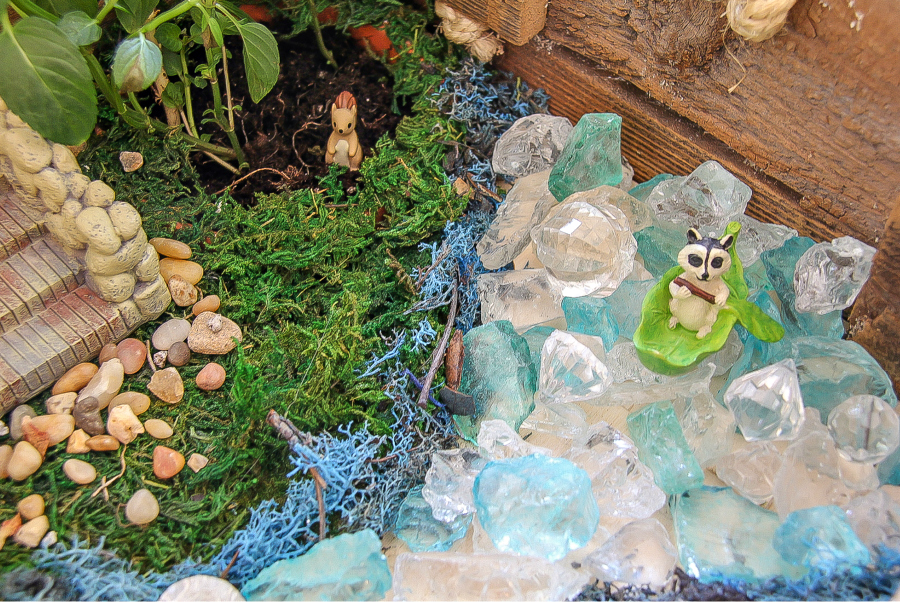
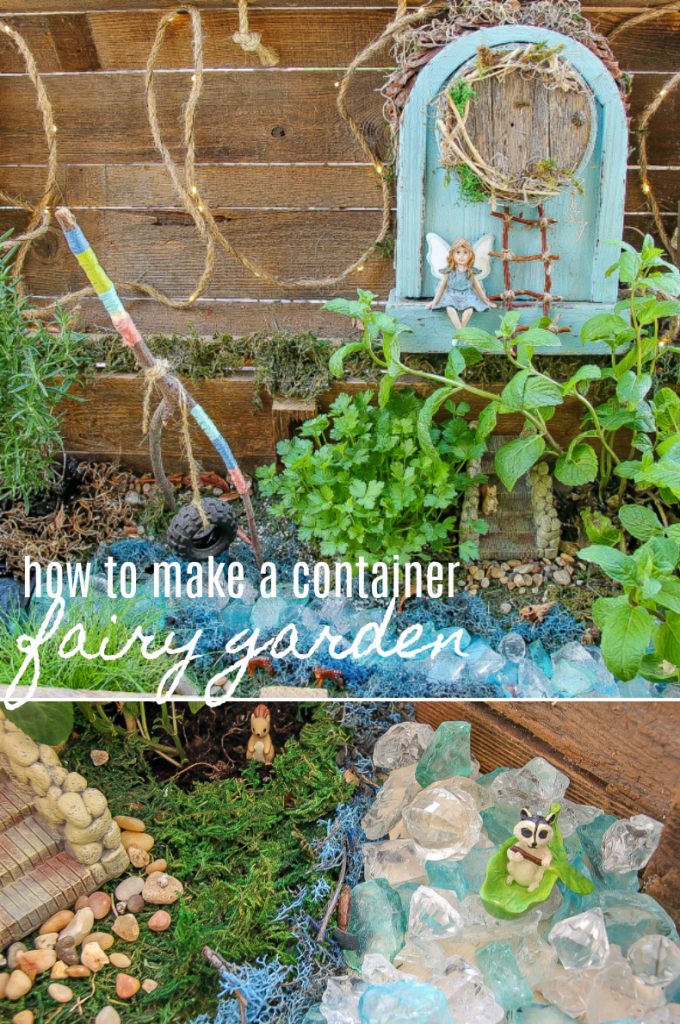
Next, using sheets of moss and spray adhesive I created the grass, leaving enough space for a river to run through the center to the fountain at one end.

We knew we didn’t want real water running through the center, just inside the small fountain, so I painted the stream with blue paint, and then we added a little blue moss and pretty stones on top.
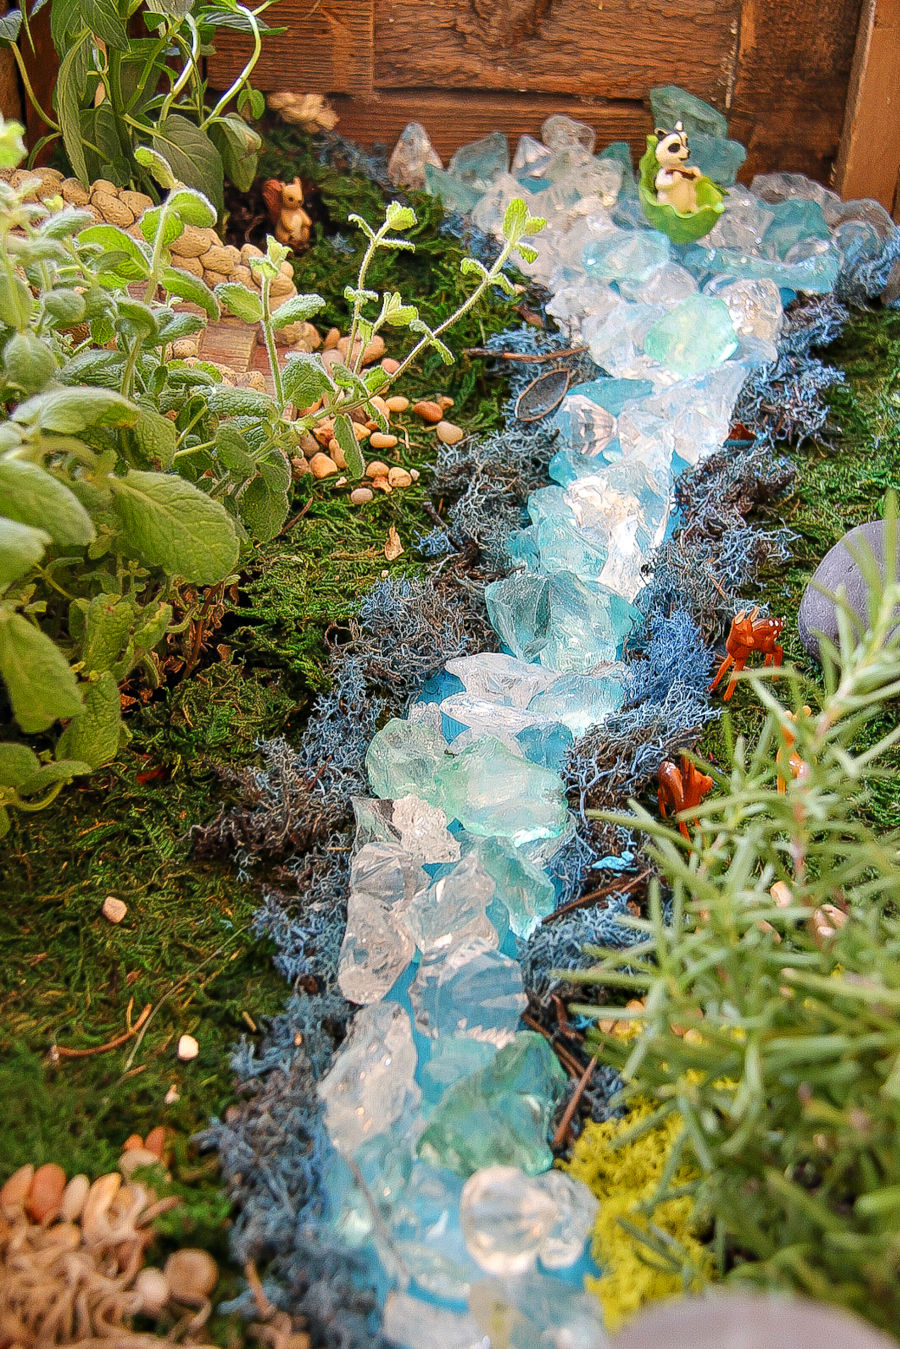
The terracotta pots we were using for the herbs seemed to look a little out of place on the grass, so I added a little of the leftover moss to the tops of those too attaching it with a hot glue gun so they would blend in.
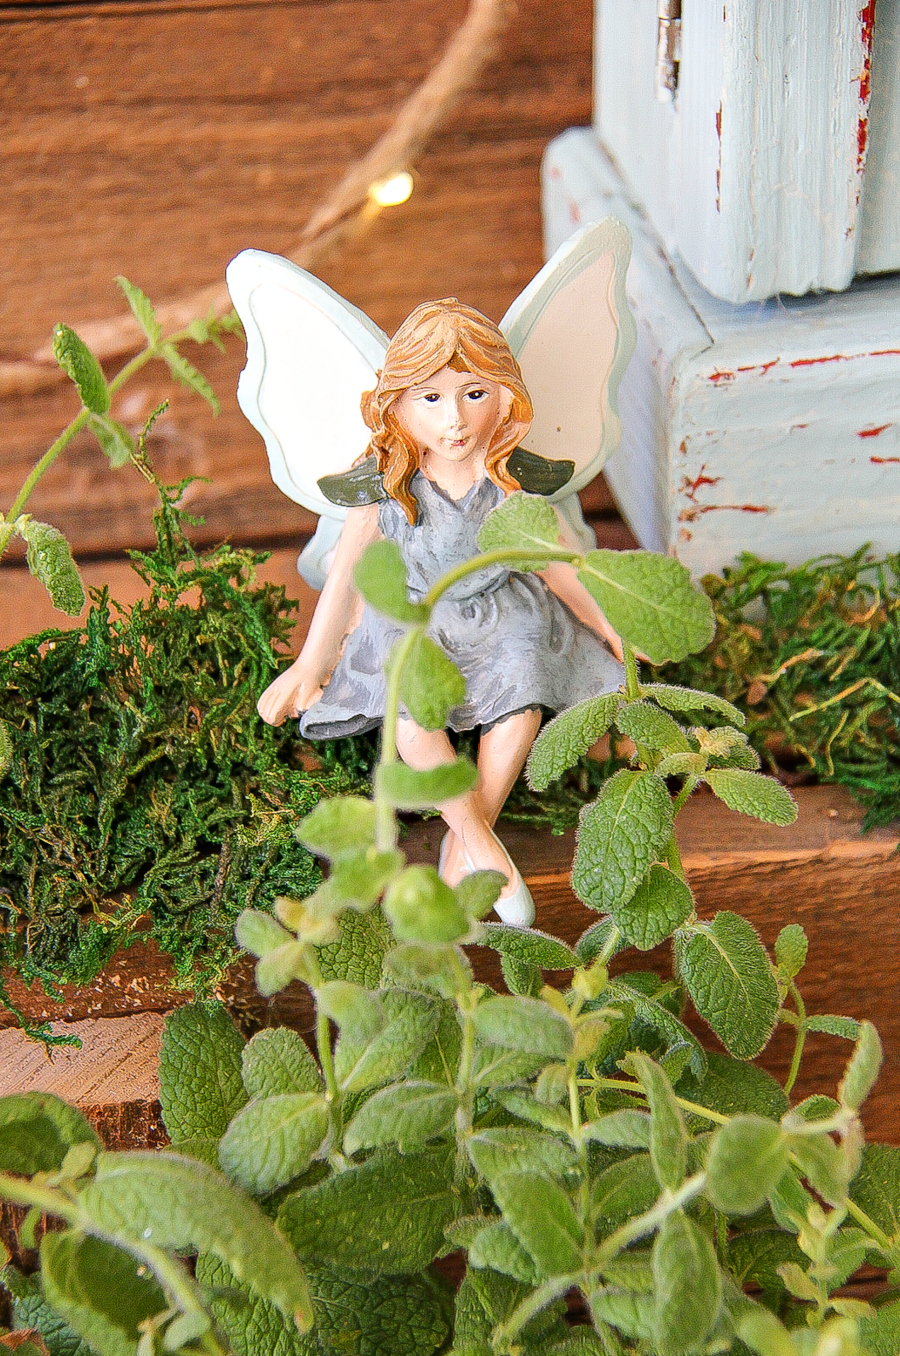
Next was to create the home for our fairy to live in.
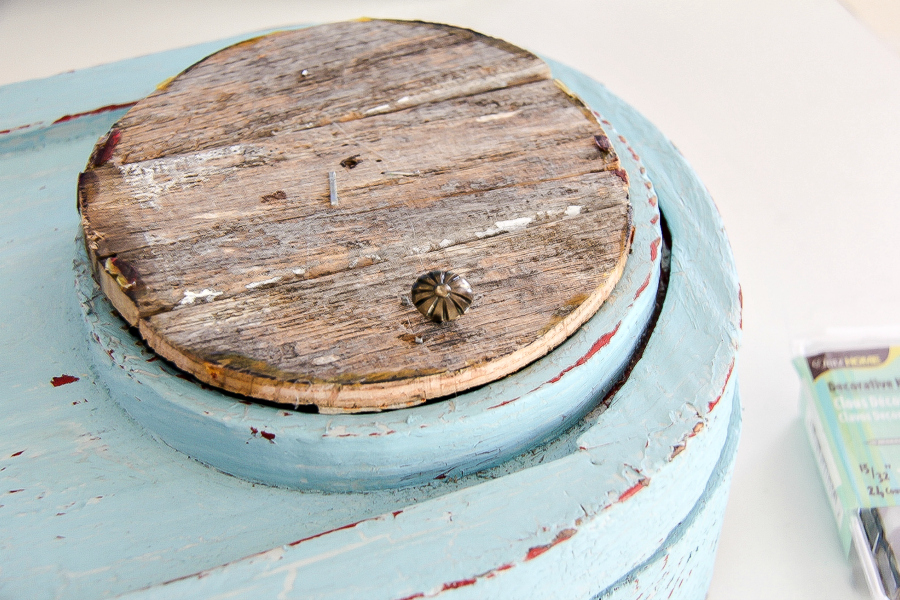
This is the shell of the clock we found.
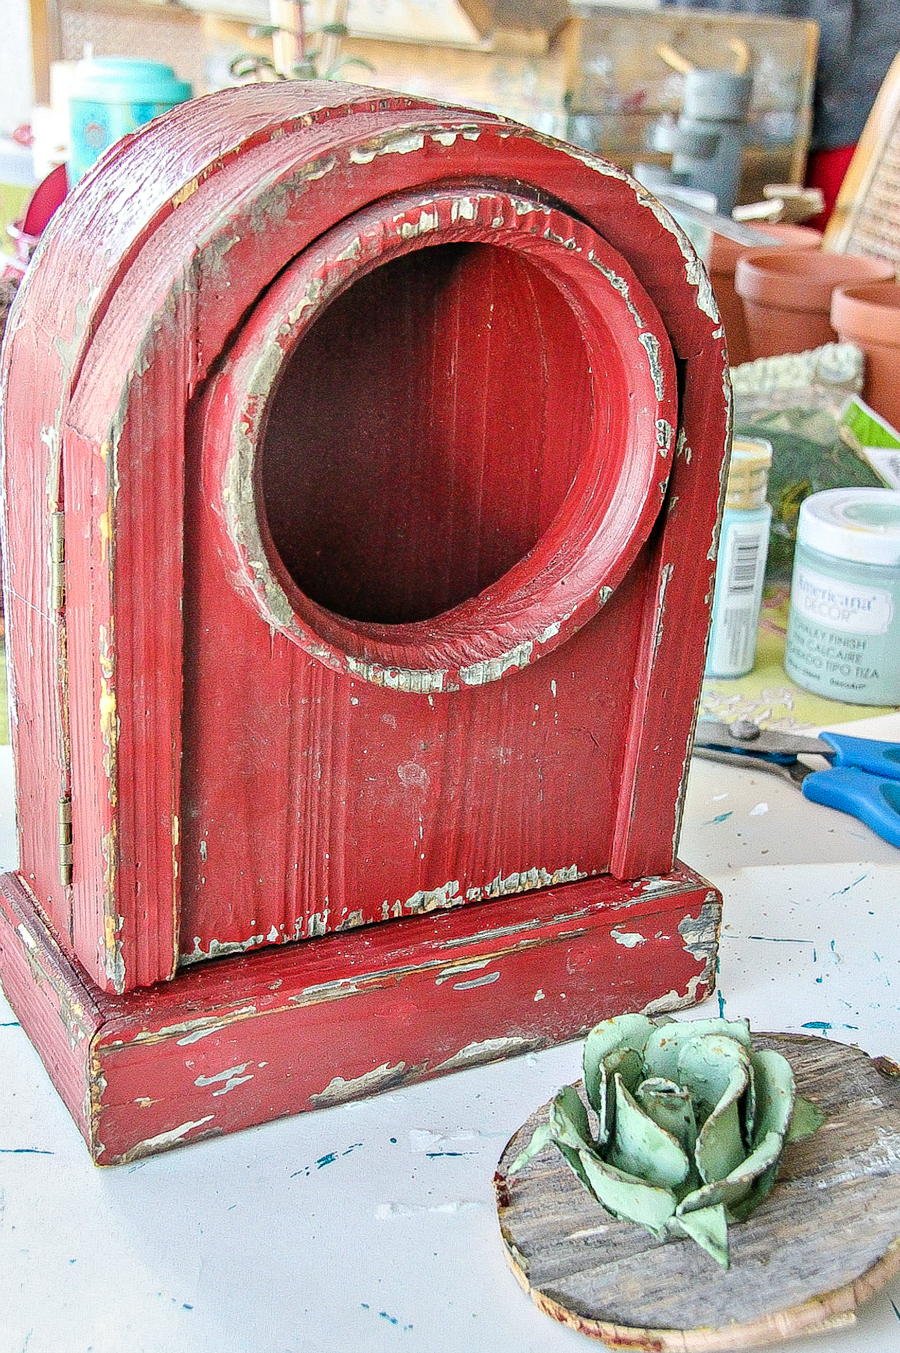
The piece of wood was attached over the hole and had this awful green flower on it. I quickly removed the flower, added a decorative pin for a door handle and we reattached the wood with hinges so that the door would open and close. I also painted the frame blue and weathered it with a sandpaper so a little of the red would still show through.
Then Mike painstakingly (and a lot of hot glue burns later) attached little pieces of pinecones to the top to make a roof and then a little moss and twigs to give it a more earthy feel.
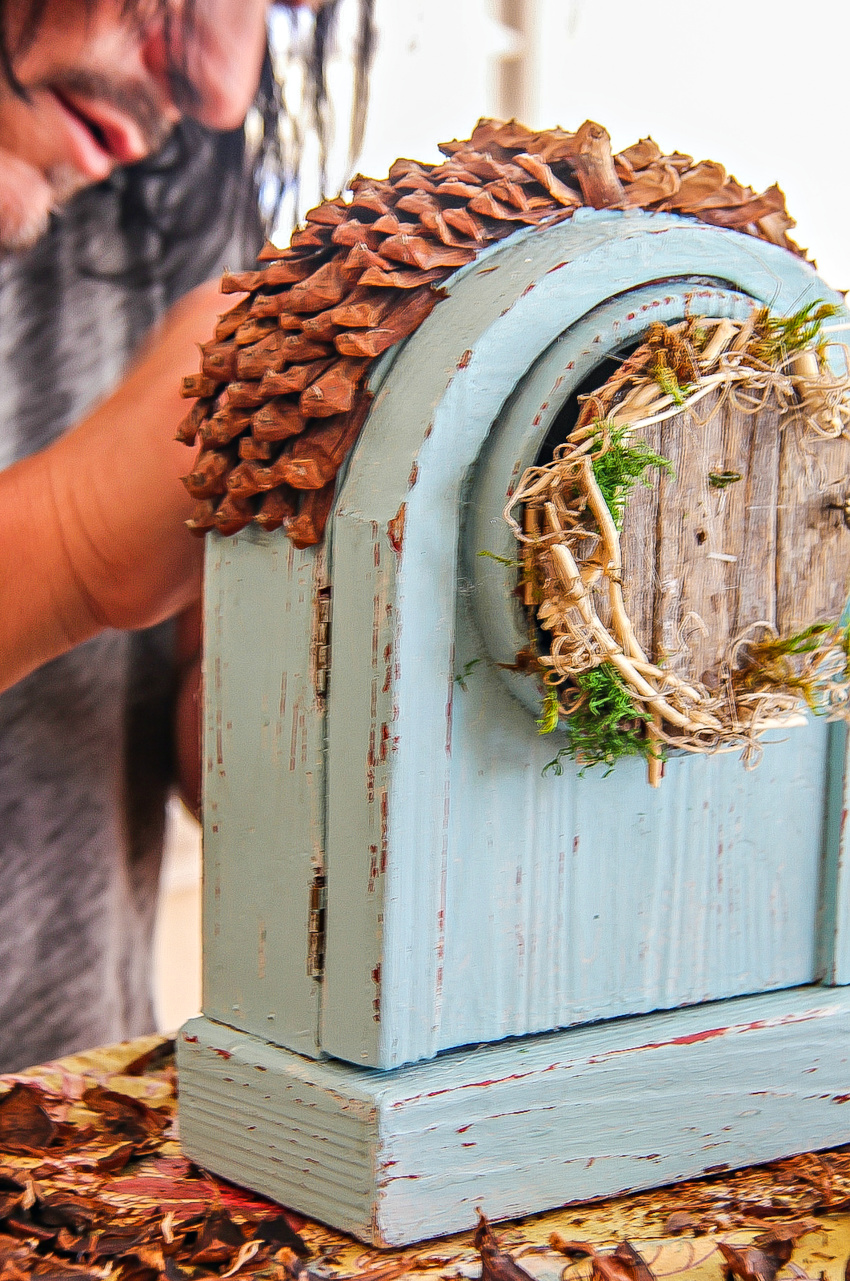
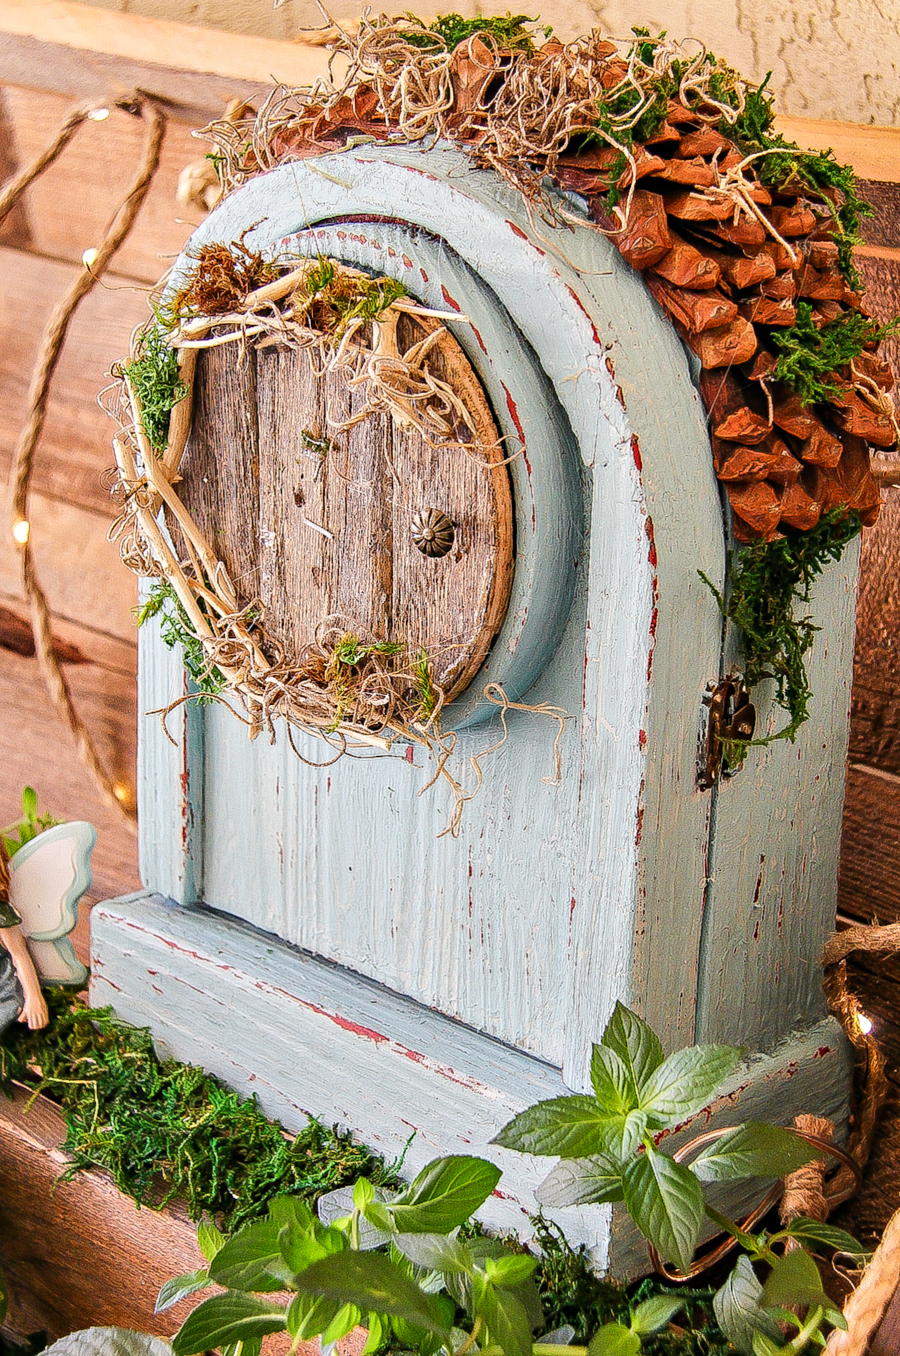
The final step was to make a small twig ladder leading down from the door which I made just with a few sticks and hemp cord.
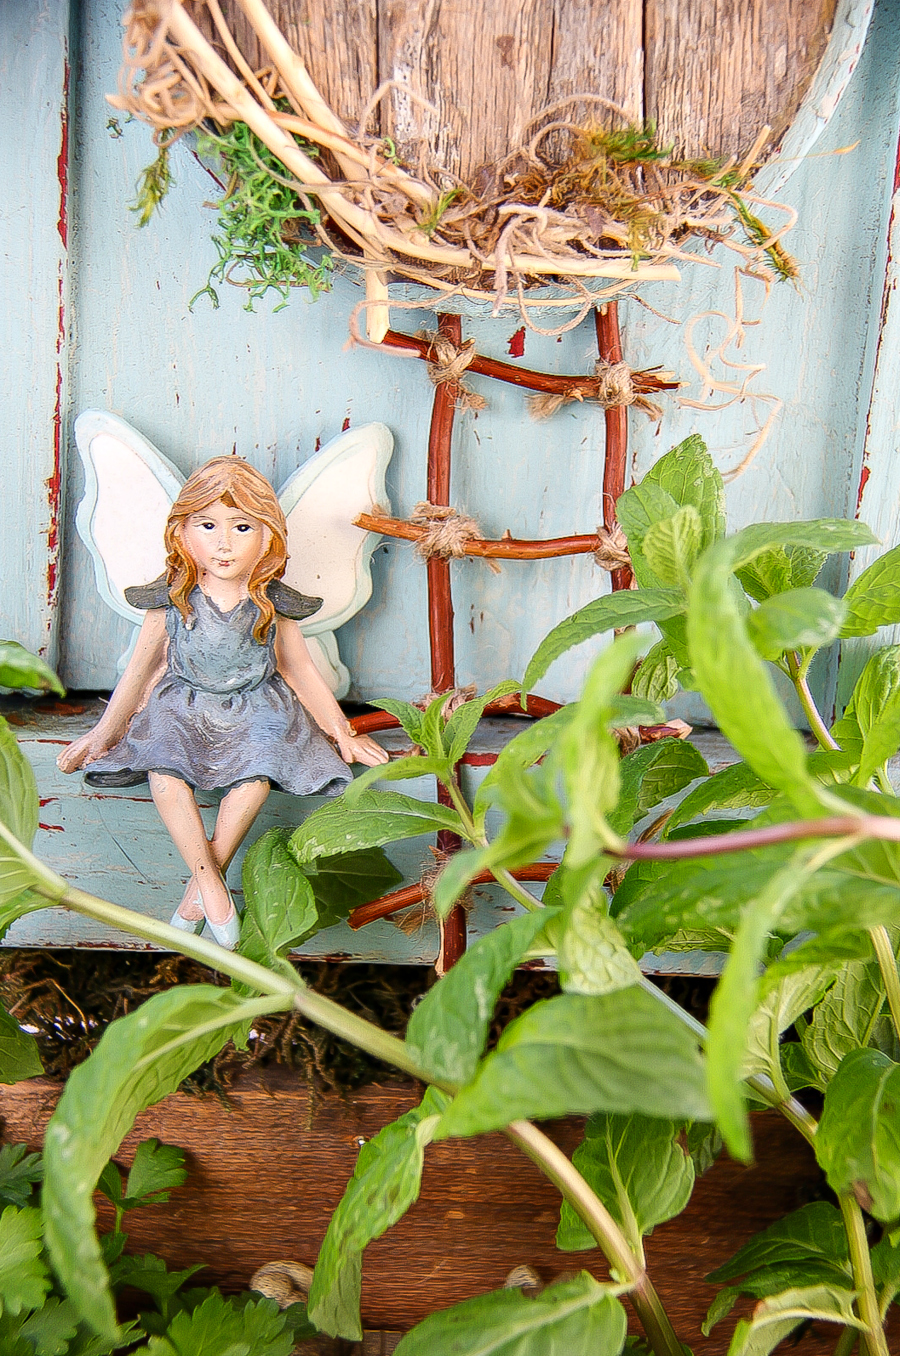
Now it was time to make our fairy garden look pretty and add the little details. You might remember the slingshot I’d made for Flynn a while ago, well we decided to use that, along with a tire from a LEGO set to make a tire swing. In order to get it to stay in place though Mike drilled two holes into the platform and then we glued the stick into place.
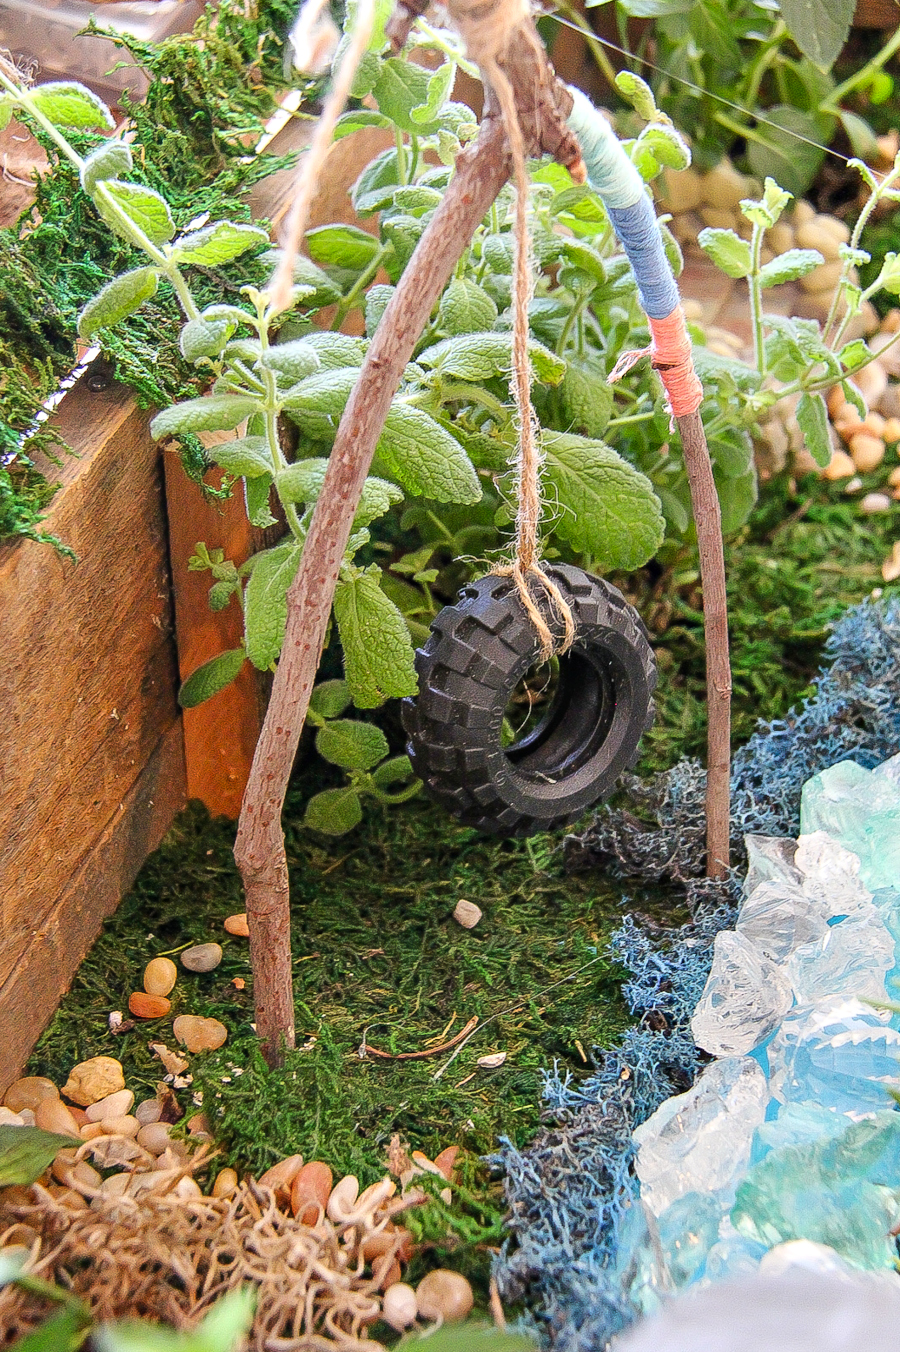
I love that we could use so many things from old projects we’d made to create this new one seeing as the kids weren’t using those other items anymore. It gave them new life.
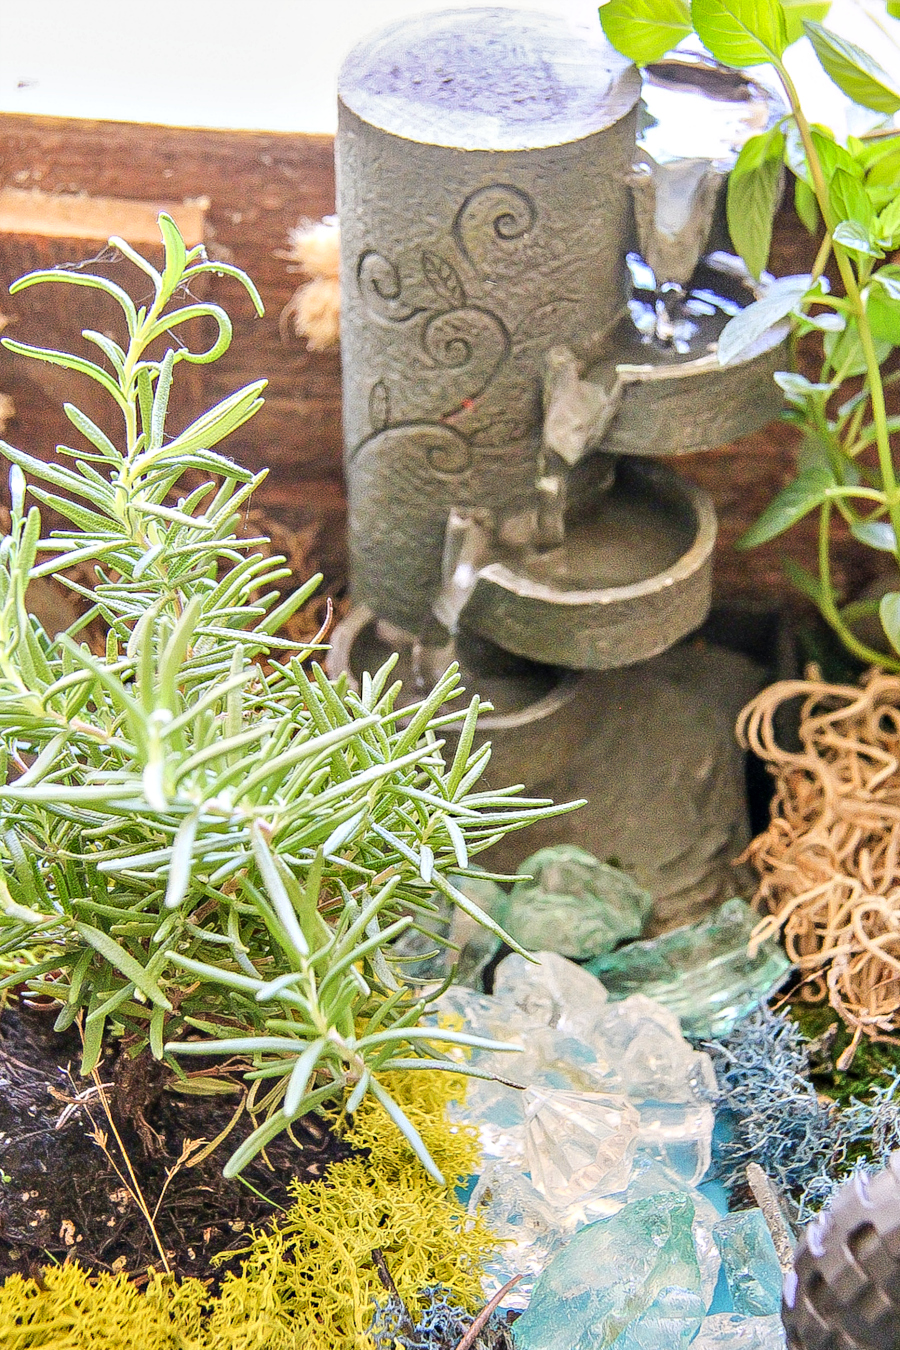
The final step was to put our plants into the pots, get our little fountain working (which you may remember from our Trolls fairy garden project), and string up fairy lights inside the lid of the box, which looks so pretty at night when we sit out on the front porch.
Now, if I could only keep the herbs alive.
Please pin this post for later.

Hi Tonya,
This is so pretty!! The fairy garden is something we’ve been planning in a small empty space (although a box would be a good idea) we have in our yard. I have a collection of fairy and bird figurines since high school and I can’t wait to make this happen.
Thank you for the inspiration. 🙂
Cheers,
Jessica
Hey there,
This is so sweet. I have a small backyard in front of my house but I did not have anytime to plant or do even basic gardening with it. For the next spring, I am thinking of making a fairy garden like yours and will be using your valuable information here. I am keen on nature and herbs so let us see.
Hope it will work out.
Take care
Maria