
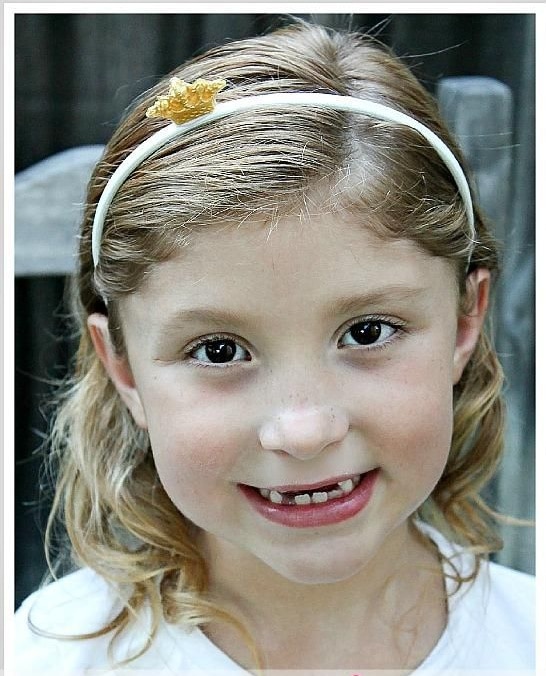
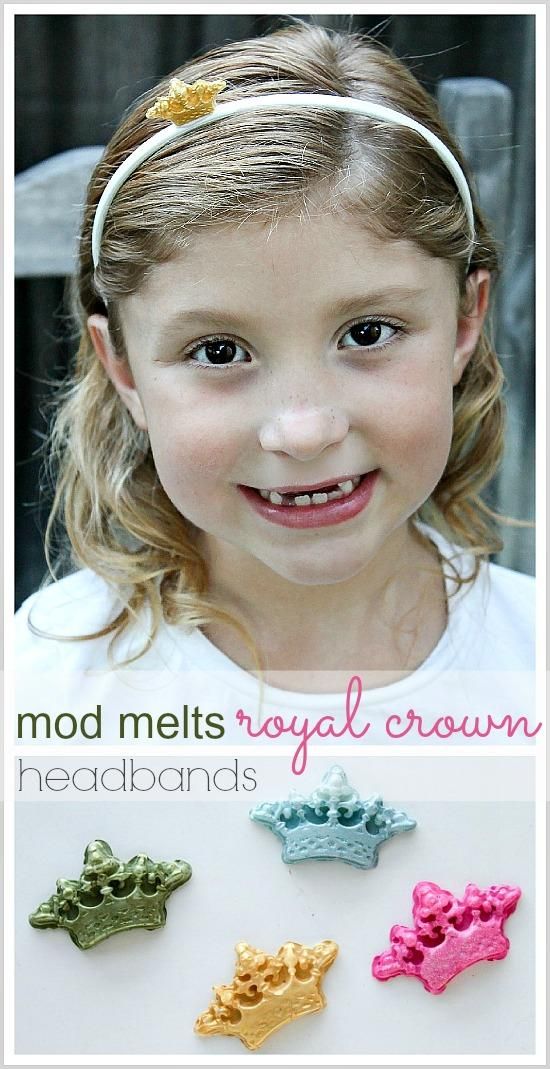
Make these beautiful mini crown headbands for your little girl using Mod Podge Mod Melts and our helpful tips.
Disclosure: This Mod Podge Mod Melts and Molds project was sponsored by Plaid.
I recently received a delivery from Plaid of the new Mod Podge Mod Melts and Mod Molds. There are a few different Mod Molds available to use with the Mod Melts, and a couple of different Mod Melts too. I received the ‘royal icon’ mold with the ‘milk glass white’ Mod Melts. They must know me so well. As soon as I saw those tiny crown molds I knew I had to make something for Miss M.
Using the Mod Melts and Mod Molds is really easy to do.
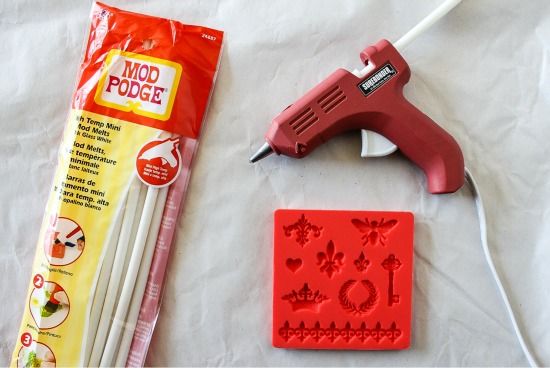
Supplies
- Mod Melts
- Hot Glue Gun
- Mod Mold
- Headbands
- Paint – Plaid FolkArt Metallic Peridot, Plaid FolkArt Metallic Inca Gold, Plaid FolkArt Sky Blue, Plaid FolkArt Parisian Pink, Plaid FolkArt Extreme Glitter Hologram
Instructions
Pop one of the Mod Melts into your Glue Gun and wait for it to heat up.
Bend the Mod Mold to expand those tiny sections so that the Mod Melt will flow easily into the smaller crevices. Place the mold quickly on a flat surface so it doesn’t begin to harden while the Mod Mold was bent out of shape.
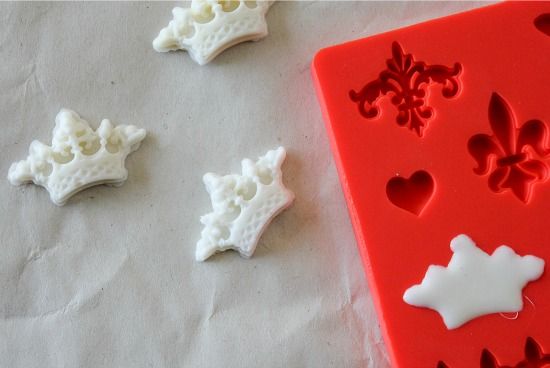
Wait until the bottom of the Mod Mold is cool to touch – approximately 8-10 minutes and pop your mold out.
Next, paint each crown mold with two coats of paint. The metallic paints didn’t need any extra sparkle, but I added a coat of the Plaid FolkArt Extreme Glitter to the pink and blue crowns.
Use a little of the leftover Mod Melts already in the glue gun to adhere the crown to the headband.

Thank you Tara :).
Thanks Kim. So does Miss M :).
Those are adorable, Tonya!
Love them!
So cute!! What great photos!
Thank you so much Carolyn
Thank you Vanessa 🙂
Adorable and so creative!
These headbands are so cute!!
Thank you Amy.