
Re-purpose a typeset drawer and transform it into a DIY wall jewelry organizer to keep all of your favorite pieces visible and organized.
Disclosure: I received an Elmer’s Spring DIY kit and compensation to purchase other products needed for this project.
UPDATE PART 2: My Jewelry Organizer won the Elmer’s Spring Creation Contest. I’m absolutely thrilled. Aside from receiving a visa gift card for winning, I also had the privilege of drawing 3 more winners from the comments via random.org to each receive an Elmer’s DIY kit.
Remember when I made the jewelry organizer for Marisol’s bedroom? I recently received an email from Elmer’s reminding me about it being that time of the year for spring cleaning, organizing, and makeovers. They wanted to challenge me to create something either on my own or using their Spring Creation Guide as part of an Elmer’s Spring Creation Contest. The only stipulation being that I had to use their newly improved Glue-All.
I’m always up for a good challenge, especially when it comes to DIY projects so I happily accepted and set to work making this:
I didn’t have a pretty jewelry organizer like my daughter, instead, my jewelry looked a little like this:
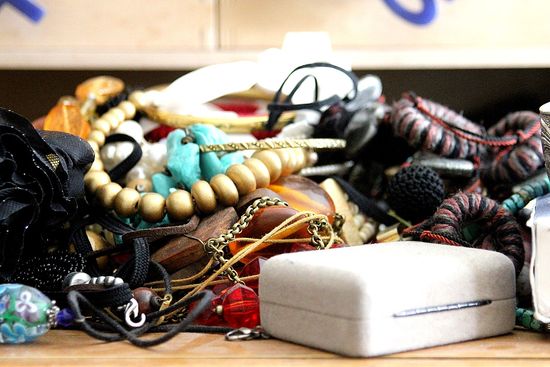
Yes, I’m hiding my head in shame. Terrible isn’t it.
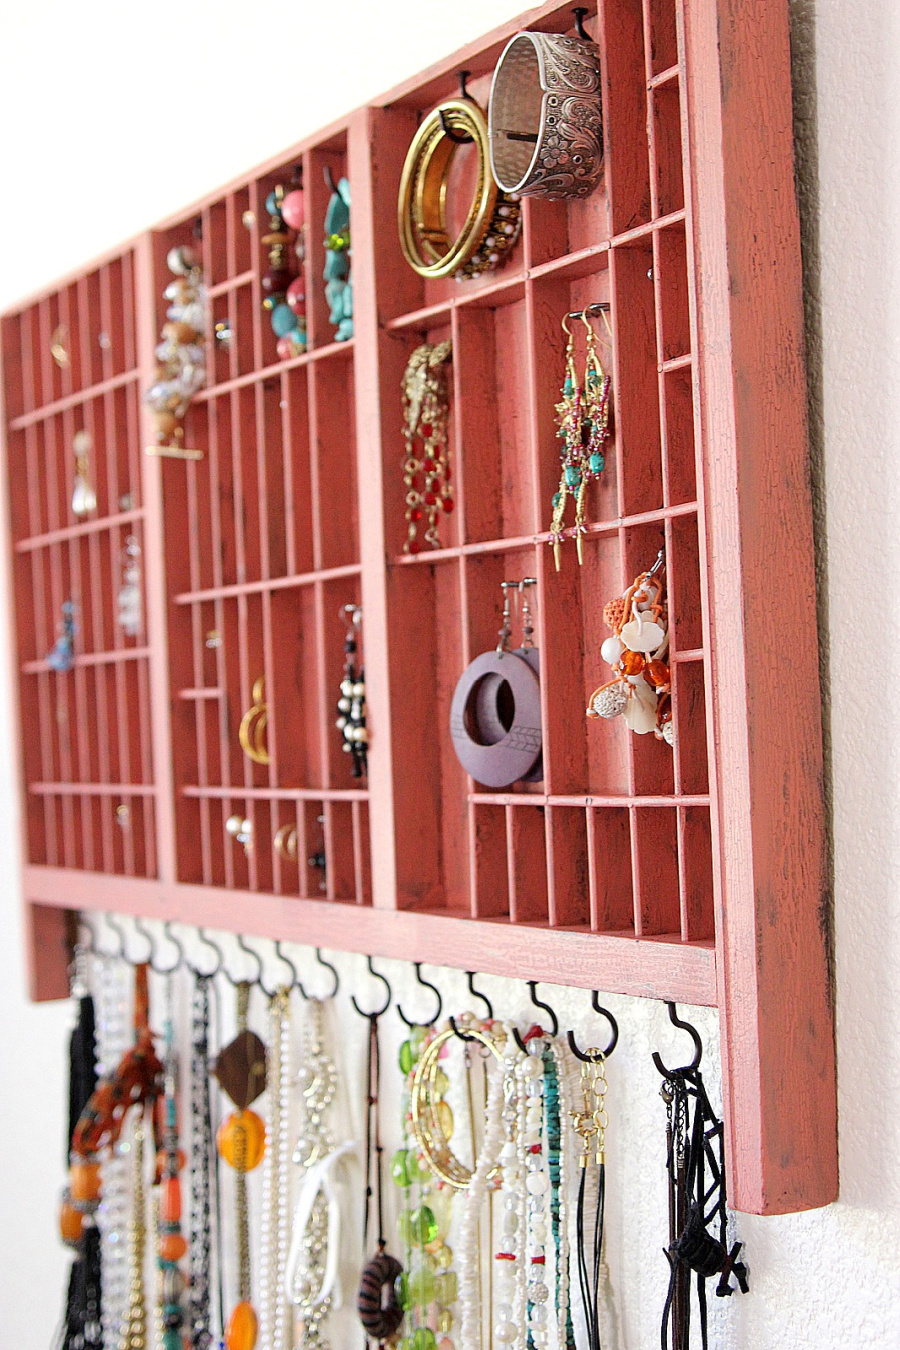
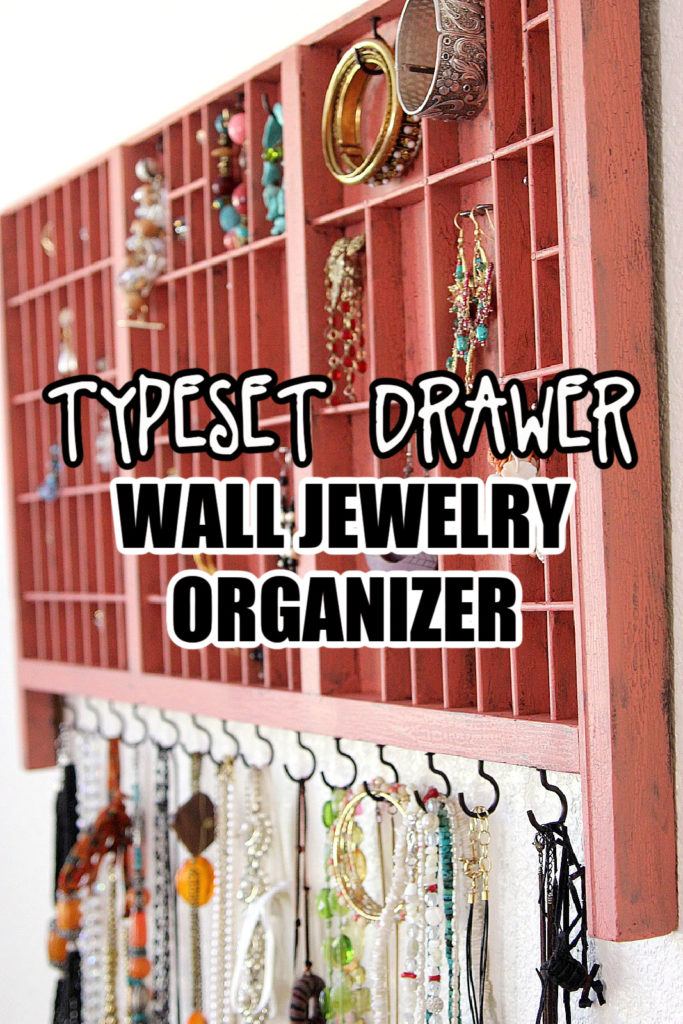
DIY wall jewelry organizer
Supplies
- Printer’s typeset drawer
- Elmer’s Glue-All
- Wood sealer
- Paint (in 2 colors) and a paintbrush
- Crackle
- Varnish
- Hooks, eye-screws, and small decorative holders
Instructions
In my head, I knew how I wanted to organize it, but it was a matter of finding the right supplies. I briefly considered picking up a few drawer organizers that I had seen at my local craft store and sticking them together, but the thought of spending over $20 per organizer was not going to be a cost-effective way to tackle this so I decided to hit up my local antique mall to see what I could find. Tucked away in a corner, I found this fabulous typeset drawer for only $15.
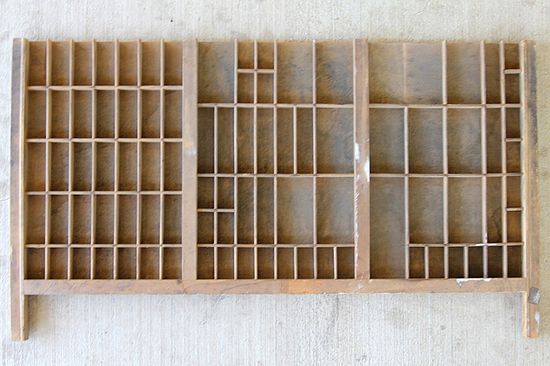
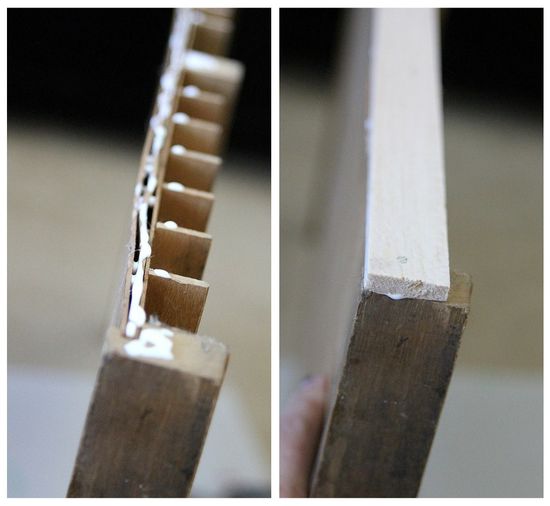
It obviously needed a lot of work. The first order of business was to break out that Glue-All and set to work making repairs to the cracks and sections that needed to be stuck down again.
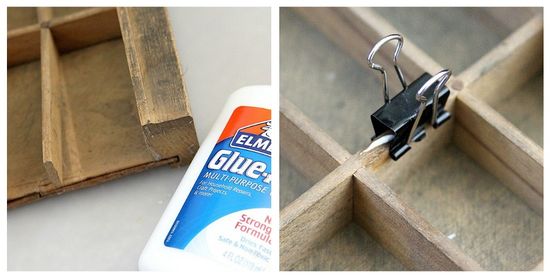
Next up was to cut a piece of wood using my X-Acto knife to the length of the tray to attach to the top with Glue-All, I also reinforced it with a couple of nails.
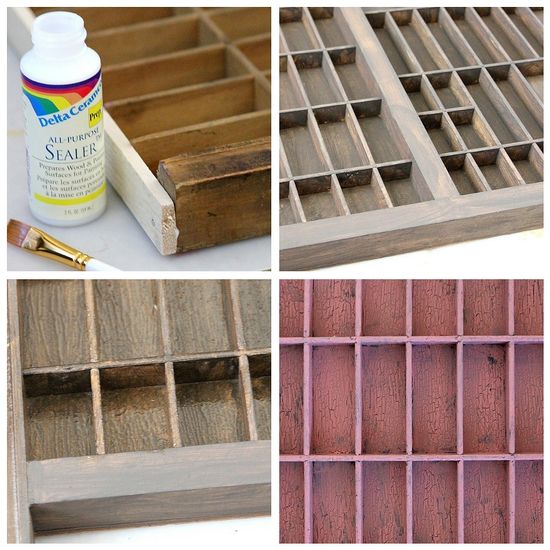
Crackle effect paint
Now we are onto the fun part. I wanted to keep with the antique feel of this typeset drawer so thought I would try my hand at creating a cracked finish. I’ve never done this before, but it was actually much easier than I thought, albeit a little time-consuming.
Step 1: Apply a sealer to the wood. Set aside to dry.
Step 2: Apply your first color – I used walnut. Again, let it dry.
Step 3: Apply the crackle. Don’t dry completely, but allow it to dry enough that it becomes tacky.
Step 4: Apply a second color of paint – I used coral. Within minutes you will see the cracks starting to appear. By the time the paint is dry, it looks fabulous.
Step 5: Apply a varnish.
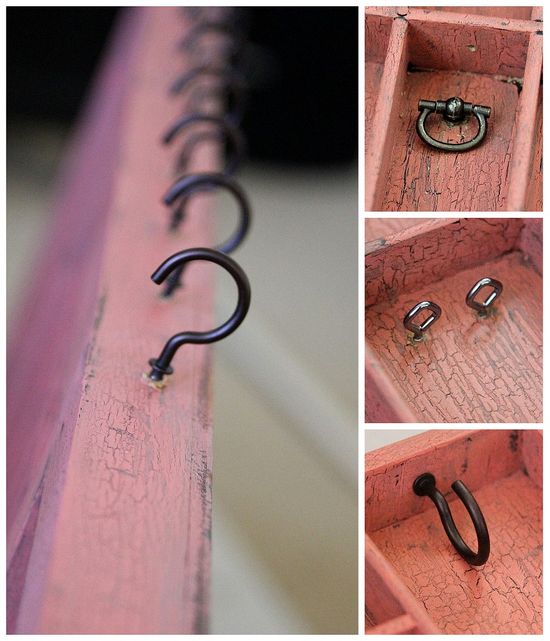
The final step is to attach hooks, rings, and eye-screws to hang your jewelry. I found most of these at the craft store.
Now you have a beautiful space to hang all of your jewelry.
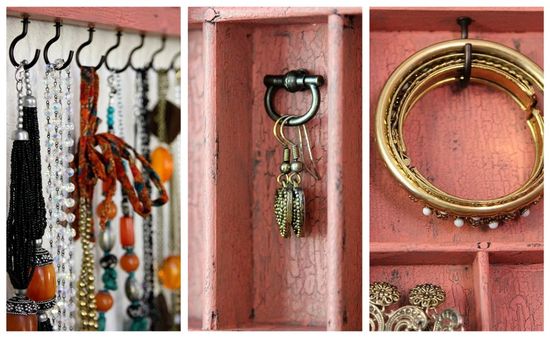
DIY jewelry organizers
You can see how I organized my large bangles too with a DIY bangle holder.

Please pin this post for later:

At first thought, my husband, kidding…seriously though, I could do with a makeover of our patio set. It’s faded, some of the wood is falling off one of the seats and since we are about to move to the tropics for a year we need something functional that looks good for all of the outdoor breakfasts and BBQs that I hope we have!
Our junk drawer of children’s stuff (crayons, rings, hair elastics, random party favors, markers…) It is truly out of control in there.I try not to open it at all because things literally jump out at me.
You know what feels good? Saying nothing. I like everything just the way it is. It’s only taken me 19 years to get it there but if stretched I can only think that I still have to removed wallpaper from a closet upstairs, but hey…it’s in a closet, who cares?
Very cute project…my 20 something daughter would love that; that girl has some accessories.
Wish I could say “nothing”, like Barbara…LUCKY LADY!
Honestly, I am currently working in my craft/workspace room, and it could use some help…some new creative ways to store things to keep them readily accessible and yet not detract from the organization or decor of the room. I have a few odds and ends that I am inspired to use to create something, given the proper tools and a little crafting motivation. 🙂
Would love to win, so I can try the products…I have a collection of different glues/adhesives I have tried over the past couple of years…it grows each time I decide the last one didn’t live up to my expectations…so I hold onto it for “light duty” projects. It would be nice to find one I love and be able to ditch the rest.
PS…I am so in love with your new jewelry storage…I want one…but I don’t have any jewelry, so maybe I should make one for SugarPlum’s dress up jewels, instead! 😉
The one area that could use a Spring makeover in my home is the Living Room. I need more bright colors and fresh air now that the long MN winter is over.
mnsteph[at]gmail[dot]com
So pretty and practical!
My entry way needs a mega spring makeover!!! But, I have been looking for a jewelry organizer for a long time, and none of them were good enough. But this! this is just what I’ve been looking for! I want to make one of these, too!!
[email protected]
gahhhh you’ve inspired me to try something like this I have 4 dd’s and they all wear this schtuff so it would be perfect here in this house!!! Love the re invented organizer!!!
My entire craft room needs a makeover! Can’t wait to use your inspiration in my room somewhere!! 🙂
Oh my goodness, I LOVE this!!! I am jealous you found a typesetting tray so cheap! They are always so expensive when I find one.