
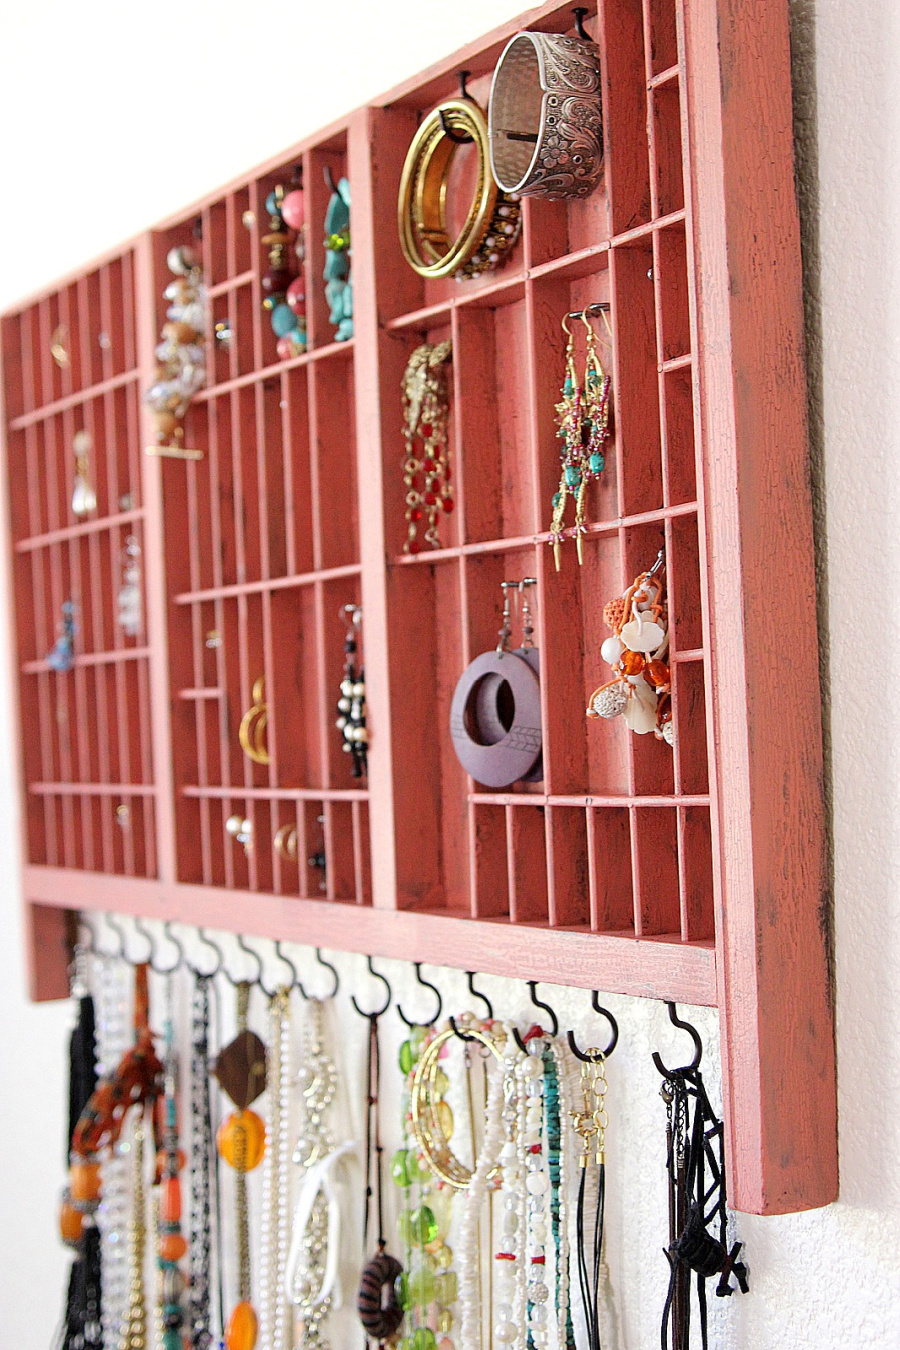
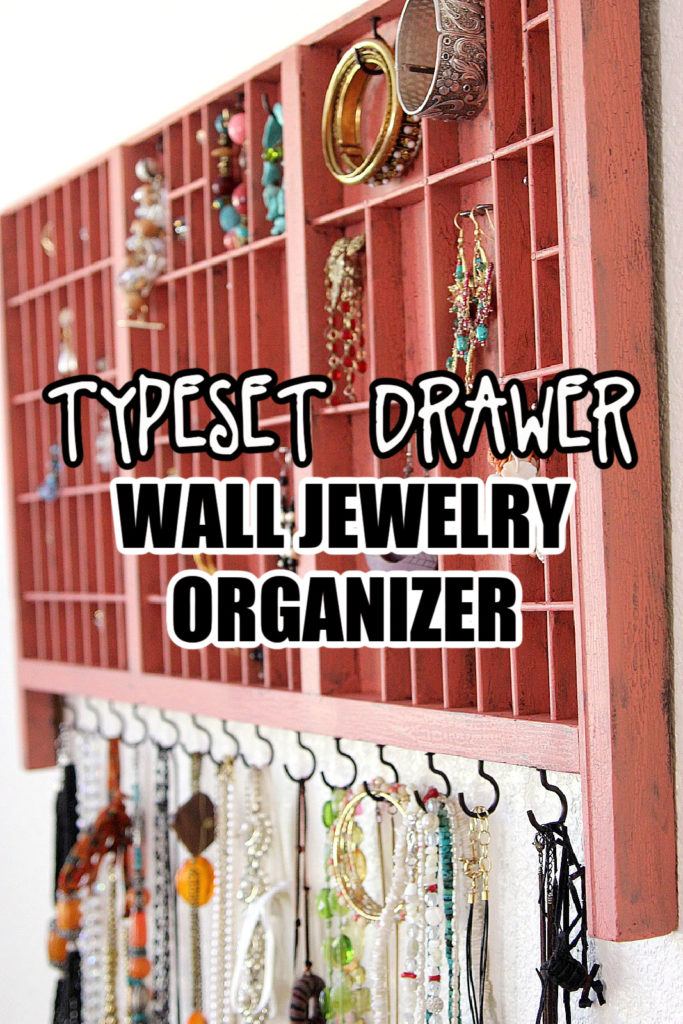
Re-purpose a typeset drawer and transform it into a DIY wall jewelry organizer to keep all of your favorite pieces visible and organized.
Disclosure: I received an Elmer’s Spring DIY kit and compensation to purchase other products needed for this project.
UPDATE PART 2: My Jewelry Organizer won the Elmer’s Spring Creation Contest. I’m absolutely thrilled. Aside from receiving a visa gift card for winning, I also had the privilege of drawing 3 more winners from the comments via random.org to each receive an Elmer’s DIY kit.
Remember when I made the jewelry organizer for Marisol’s bedroom? I recently received an email from Elmer’s reminding me about it being that time of the year for spring cleaning, organizing, and makeovers. They wanted to challenge me to create something either on my own or using their Spring Creation Guide as part of an Elmer’s Spring Creation Contest. The only stipulation being that I had to use their newly improved Glue-All.
I’m always up for a good challenge, especially when it comes to DIY projects so I happily accepted and set to work making this:
I didn’t have a pretty jewelry organizer like my daughter, instead, my jewelry looked a little like this:
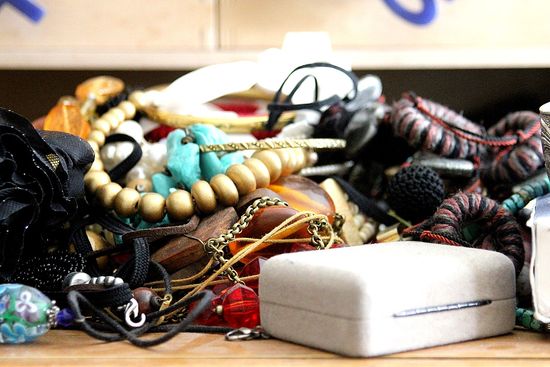
Yes, I’m hiding my head in shame. Terrible isn’t it.
DIY wall jewelry organizer
Supplies
- Printer’s typeset drawer
- Elmer’s Glue-All
- Wood sealer
- Paint (in 2 colors) and a paintbrush
- Crackle
- Varnish
- Hooks, eye-screws, and small decorative holders
Instructions
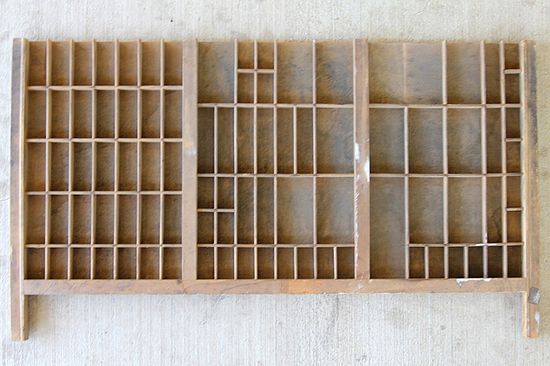
In my head, I knew how I wanted to organize it, but it was a matter of finding the right supplies. I briefly considered picking up a few drawer organizers that I had seen at my local craft store and sticking them together, but the thought of spending over $20 per organizer was not going to be a cost-effective way to tackle this so I decided to hit up my local antique mall to see what I could find. Tucked away in a corner, I found this fabulous typeset drawer for only $15.
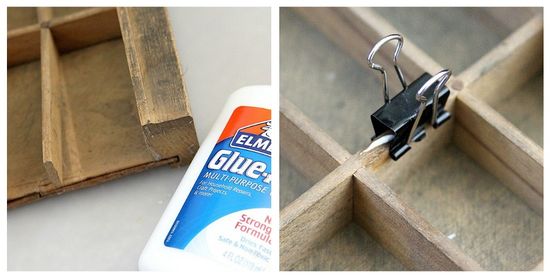
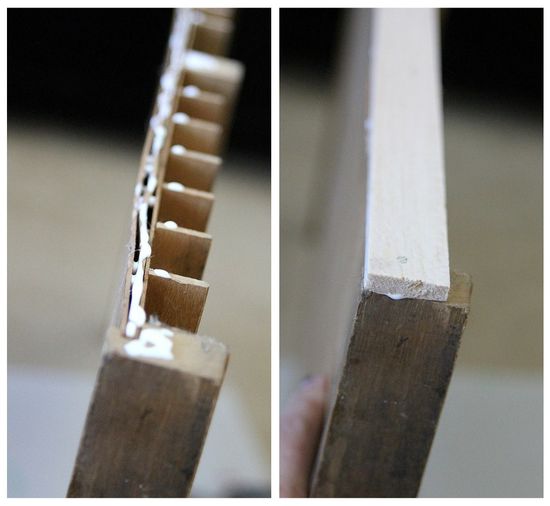
It obviously needed a lot of work. The first order of business was to break out that Glue-All and set to work making repairs to the cracks and sections that needed to be stuck down again.
Next up was to cut a piece of wood using my X-Acto knife to the length of the tray to attach to the top with Glue-All, I also reinforced it with a couple of nails.
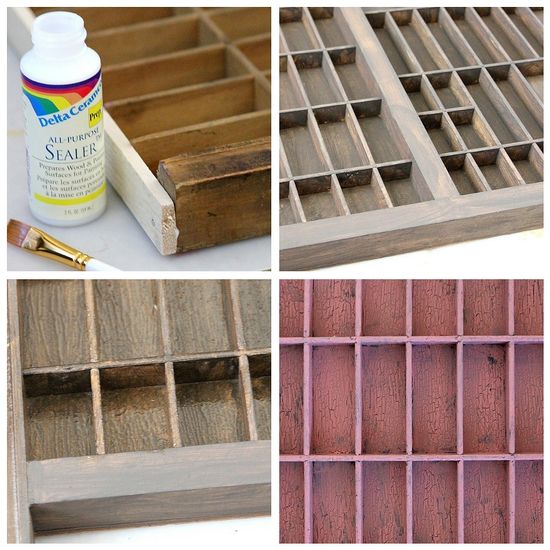
Crackle effect paint
Now we are onto the fun part. I wanted to keep with the antique feel of this typeset drawer so thought I would try my hand at creating a cracked finish. I’ve never done this before, but it was actually much easier than I thought, albeit a little time-consuming.
Step 1: Apply a sealer to the wood. Set aside to dry.
Step 2: Apply your first color – I used walnut. Again, let it dry.
Step 3: Apply the crackle. Don’t dry completely, but allow it to dry enough that it becomes tacky.
Step 4: Apply a second color of paint – I used coral. Within minutes you will see the cracks starting to appear. By the time the paint is dry, it looks fabulous.
Step 5: Apply a varnish.
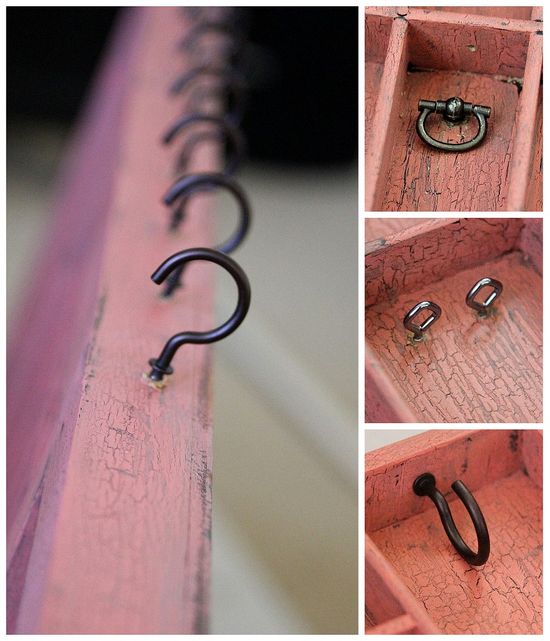
The final step is to attach hooks, rings, and eye-screws to hang your jewelry. I found most of these at the craft store.
Now you have a beautiful space to hang all of your jewelry.
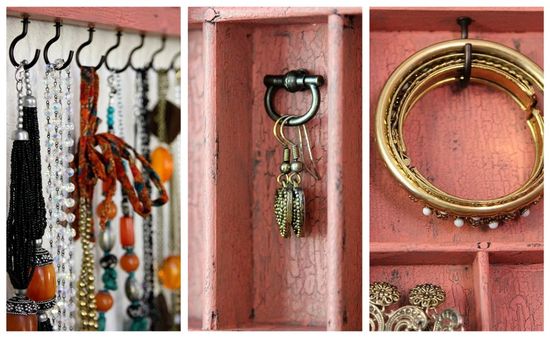
DIY jewelry organizers
You can see how I organized my large bangles too with a DIY bangle holder.

Please pin this post for later:

Oh my gosh, this is so adorable! I’m always so jealous when people find the absolute perfect thrifted item to make stuff with. I never have that kind of luck. What an absolutely adorable way to organize your jewelry!
Thank you so much. My 4yr old daughter loved it so much that she demanded one for her too, thank goodness the store had a second smaller type set tray and I was able to go back and pick that up for her. I'll be turning that one into a child friendly (aka more bangle hooks) shortly.
I LOVE this! What a beautiful piece to display all your beautiful pieces 🙂
This is amazing!!! So inventive — no wonder it won! Cannot say enough how great your creation is and how many people it will surely help! Thanks so much for sharing! — Social Media Manager of Pawngo, the pawn shop reimagined
My bathroom area needs a spring makeover. I need to pretty it up and get it organized. Also, I love that jewelry organizer.
supaflychikenpi2 AT gmail DOT com
You absolutely do need one :). My daughter also told me she needs one. I am making a smaller version for her, but with larger sections for bracelets and bangles instead of earrings
I need me one of these!! I love the tiny hooks, perfect for dangley earings 😀
I just picked up all of the items for this great project! Even bought the type set tray for $15 on Craigslist today! Score!!!
I have two questions about this…
1. When you said you used a walnut paint, did you actually use a walnut finish or a walnut colored acrylic paint?
2. Did you need to sand the type set tray down before you applied the sealer (the first step you have listed)?
Thanks & love your blog!!
Yay. I'm so happy you are doing this. You have to share photos when it's finished.
Q1. I used a walnut colored acrylic paint.
Q2. I sanded it down just a little in the rough areas where pieces were sticking out etc, it was too hard (or maybe I was too lazy) to sand inside the small compartments though
Hi Brandi, I screwed all of the hooks in using a pair of long nose pliers so I didn't have to wind them using my fingers which was a little difficult to do in some of the smaller sections.