
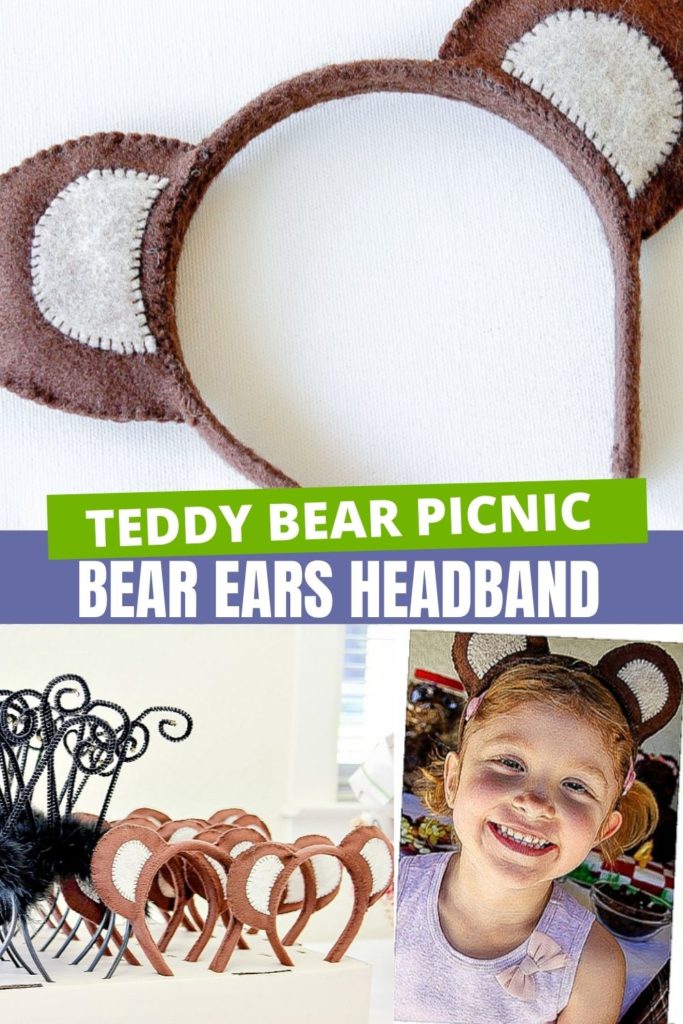
This handmade teddy bear ears headband is not only the perfect addition to a bear costume, but also makes a great favor for a teddy bear tea.
The twins’ birthday party was a week ago. It was a teddy bear picnic theme, which I think is such a fun, casual theme for a party.
Instead of supplying party hats for the guests, I handmade teddy bear ears for everyone to wear and take home. Actually, they got to choose between teddy bear ears and bumblebee headbands.
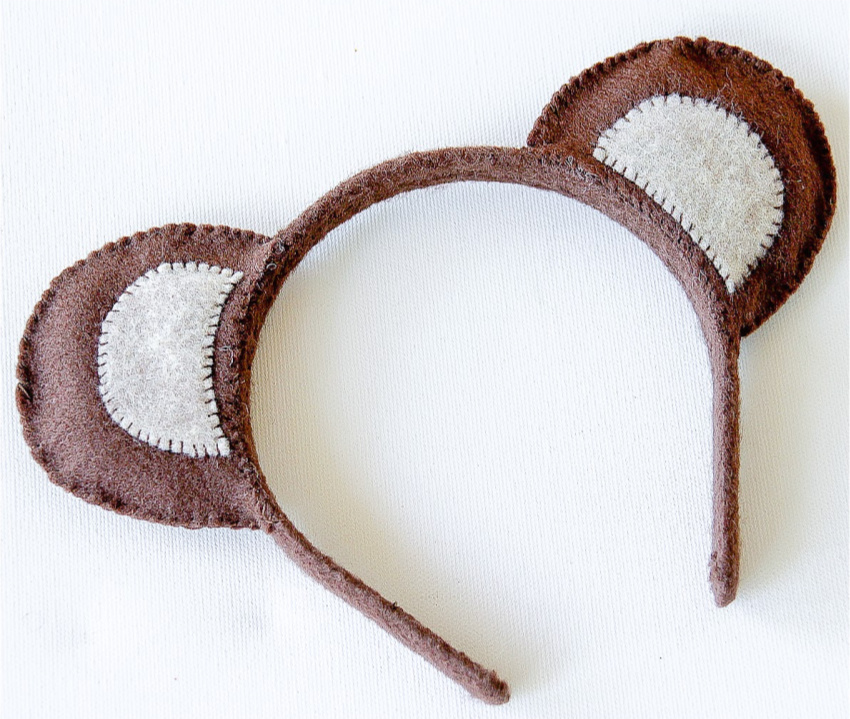
Bear ears headband
Supplies
- Felt in tan and brown
- Plain headband
- Sewing needle
- Embroidery thread
- Stuffing
- Scissors
I purchased the plain white headbands from Amazon. They are $17 for 50. I found this to be the most cost-effective way to do a large number of these, plus I have a lot of headbands left over for future craft projects.
Instructions

Cut out the pieces of felt required:
- 1 long strip to make a sleeve for the headband – measure the width of the headband, double it and add an extra 5mm for stitching. Measure the length and do the same.
- the large part of the ear – Cut a piece of paper to the correct shape and use that as a template. You will need 4 ear pieces per headband.
- the small inner section of the ear – as above, but you will only need 2 per headband.
Stitch the long sides of the sleeve together using an over-edge stitch (using the sewing machine or by hand). Pull the sleeve over the headband, fold the ends over and stitch by hand.
Stitch the inner ear to the outer ear and then stitch the back and front of each ear together. Use a couple of strands of embroidery thread.
Put a small amount of stuffing in each ear. This is to help the ears stand up and fill them out a little so they don’t flop over when stitched to the headband.
Stitch each ear to the sides of the headband. Stitch as close to the edge of the headband as you can. If you stitch the back and front of the headbands close together the ear will most likely flop.

These would also make a great Halloween gift for your child to hand out to their classmates at school, or as party hats, which is what we did.
Please pin this post for later:

Amazing
Very much inspired with teddy bear ears.I just gonna try with rabbit ears. All kids like to wear it. Such a cute and perfect accessories. Very simple and thanks for steps.
This is such a great tutorial – thank you! I’ve made ears like this before but they just flopped over. Your idea to put a little stuffing in them worked beautifully! Thank you!!
My pleasure, I'm so glad you like them and yes I know what you mean, the tutorials I researched did just appear to flop, there was nothing to support them.
Hi I was wondering what kind of felt you used and where you got it? The kind I find at the craft store is very thin. Thanks for the tutorial and help!!
I did purchase the felt at a craft store, it was so long ago that I cannot remember which one though. It would have either been Beverly's or Michaels. I do remember that one store had slightly better quality than the other – I'm thinking it would have been Beverly's, but honestly I cannot remember for sure.
Thanks for getting back to me on this! We don’t have a Beverly’s here, and the felt at Michaels was pretty thin. I will have to see what I can find 🙂
I am so thankful for this post! I have white mice ears to sew this week and now I have a method! THANK YOU!
So happy I could help. How did they turn out? I'd love to see a pic.
Thank you. You would be able to sew the individual ears and the cover for the headband on the sewing machine, but I found that the ears stand up better if you hand stitch them to the outside of the headband.